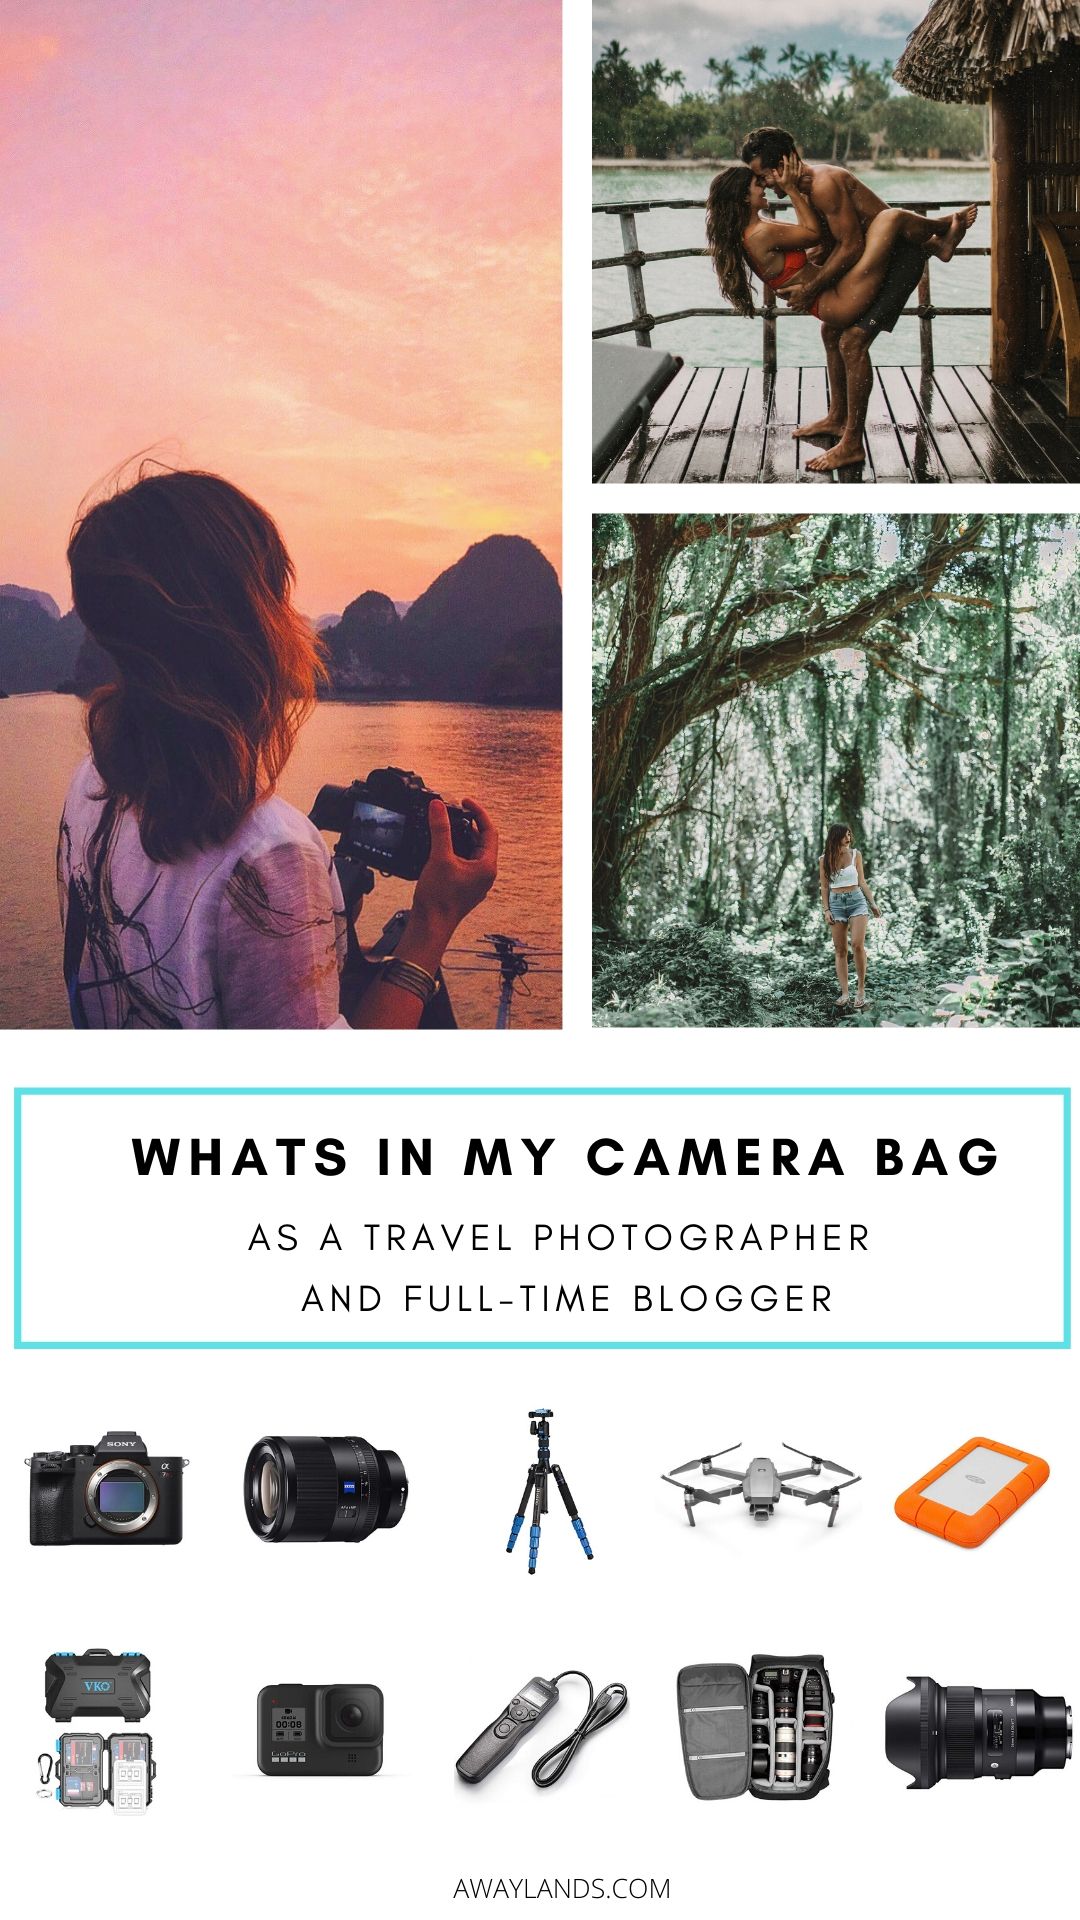
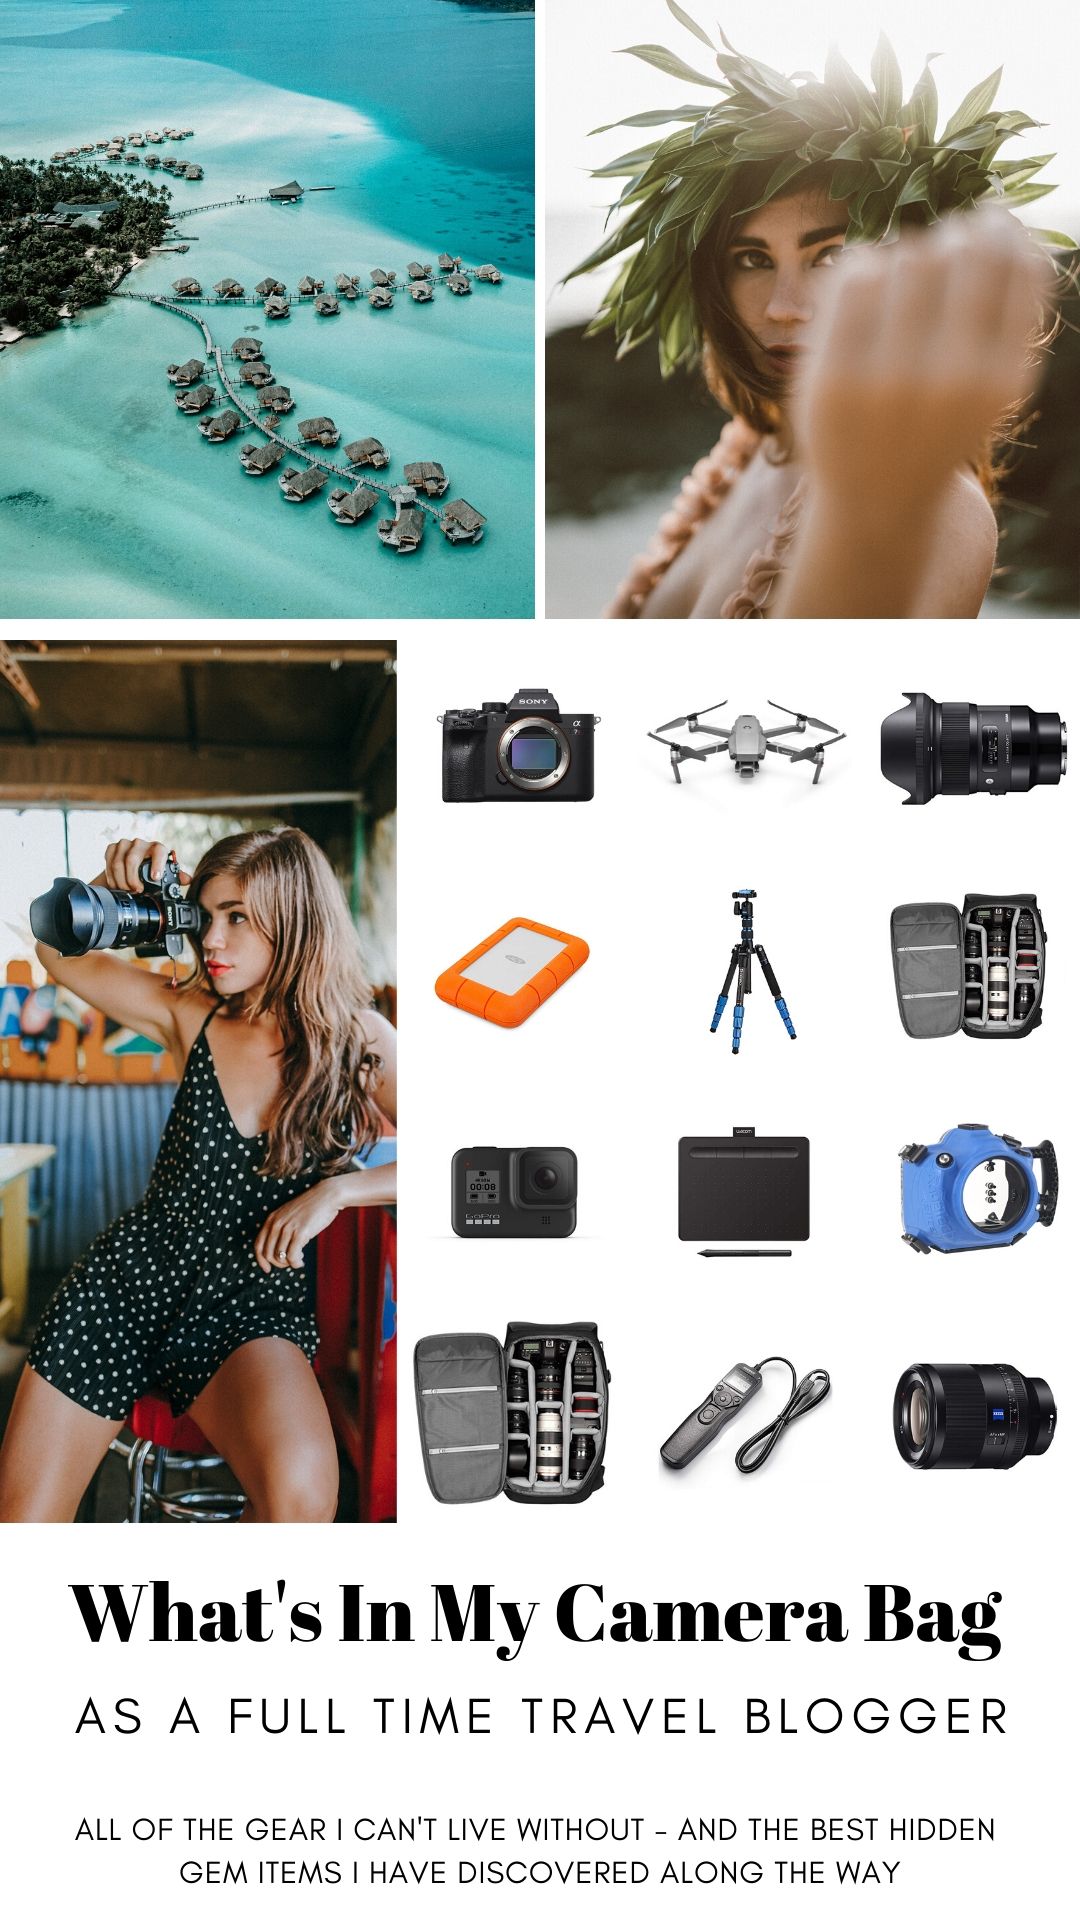
Travel Photography Gear: What's In Our Camera Bag
One of the most commonly questions we get asked over and over again is, what do you shoot with? While gear is only one factor of creating photography, and a great camera does not a great photographer make, it's an extremely important part of the process. Having the right camera and lenses opens up your ability to make your visions come to life.
Beyond the standard camera and lenses we use the most often, I've broken down the tripods, storage solutions, editing tools, camera bag, and all of the exact small items that we rely on day in and and day out - and a few inexpensive accessories that I have no idea how we lived without before discovering!
And, most importantly for many of you: the best similar versions to what we are using at more affordable price point!
Our Camera: Sony A7RIV
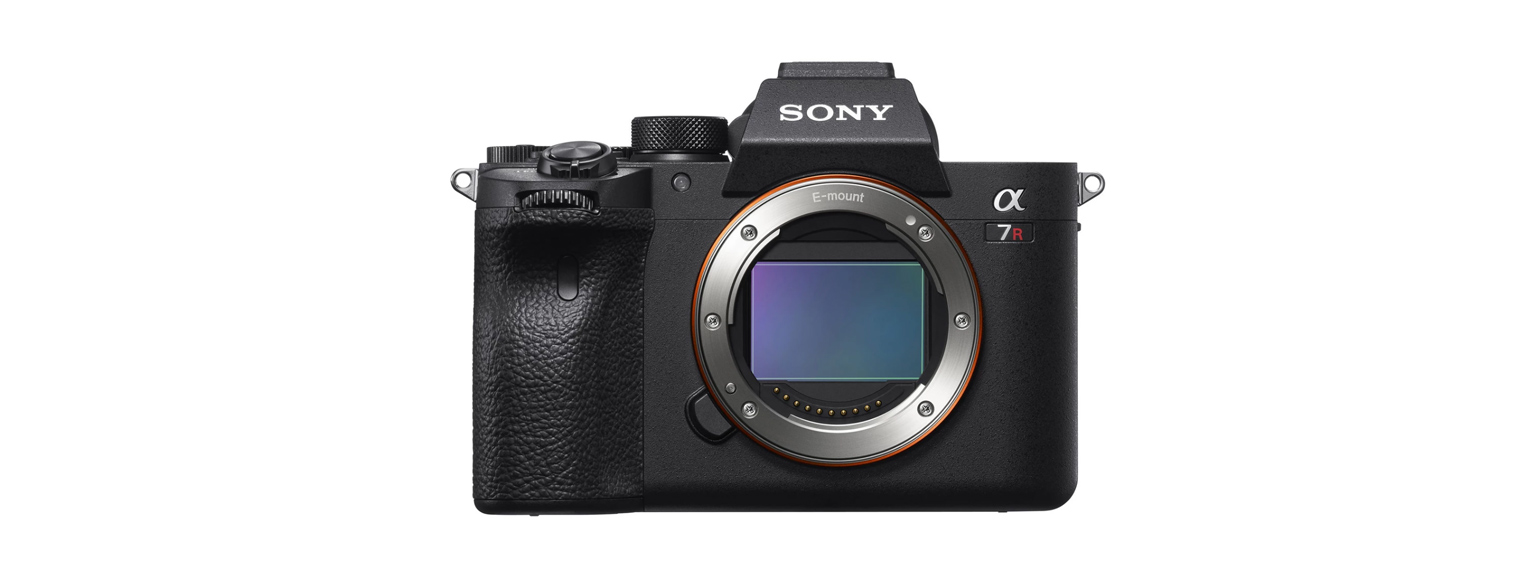
I have been a HUGE fan of the Sony Mirrorless system since I first tried out the A7RII back in 2015. I had been raised on Canon Cameras - I first learned photography on an old Canon 35mm film camera, and then got one of their earliest digital SLRs back in High School, eventually moving up to the 5Ds. I was in deep with Canon - and then Brandon bought this little Sony Camera as soon as it came out. We did one trip with both cameras, and after I started to look through the images, I was hooked! I immediately sold all of my Canon gear and have been a huge, vocal Sony fan ever since!
6 Reasons why the Sony A7RIV is my camera of choice:
- First and foremost: the visual quality. Almost every photo I have posted on this blog has been taken with a Sony A7R and Brandon and I have built our lives on the tiny back of these cameras. Almost 5 years after buying our first model, I am still continually impressed with the images this camera is able to capture.
- The body size much smaller and lighter than a traditional DSLR. This makes a huge difference for both travelers concerned with camera size and weight, and also for women's smaller hands. As a female photographer and filmmaker, I have spent a lot of time with my hands on a variety of gear, and nothing has ever felt like it fit in my smaller hands as well as these camera bodies.
- The dynamic range in the files is seriously impressive. I have never seen a still camera with a better ability to balance extreme highlights and shadows. The range gives you so many more options to push exposures and to get extreme with editing - or to correct exposure mistakes while shooting.
- The focus system is easy to use, and is usually incredibly accurate.
- The resolution is insane! Versions 2 and 3 had 45 Megapixel Sensors, and this model has now expanded to a 60 Megapixel. While you don't need images that large for most web and social media uses, the option of being able to crop way, way in comes in handy very frequenting and so does the future-proofing of the files - this file size will be more than sufficient for many years to come. They are large enough that you can make huge prints for your home, to use on products, or to even put them on to billboards.
- The built in video is amazing! In the beginning, Brandon and I shot all of our photos and videos on just this one Sony camera, and even though as our commercial video business has grown we have expanded our video line up, the video on here is still just beautiful. For such a small body, it packs an incredibly powerful punch in the ability to shoot both. My only complaint is that the new model still doesn't have the ability to 4k video in 60FPS, but for most users that's not a problem.
Now, i know that the A7RIV is a very top of the line camera at a high-end price point. While I deeply love this camera, Sony has some incredible options for much less money that still pack an amazing punch. If you are looking for a small, pocket-sized camera that still shoots beautifully, I would highly recommend the Sony Alpha a6000, which has made a name for itself as an amazing vlog or blogger camera, or for those seriously looking to reduce the weight they carry. For a more affordable version of the Sony A7R line, The Sony A7II or Sony A7III are also incredibly powerful. The newly released A7III is priced at $1800, while the A7II body with a 24-70mm lens is available as a great all-in-one deal for $1000.
*I also wanted to note that I am not sponsored by Sony in any way - (But would to be in the future - hit me up guys!)
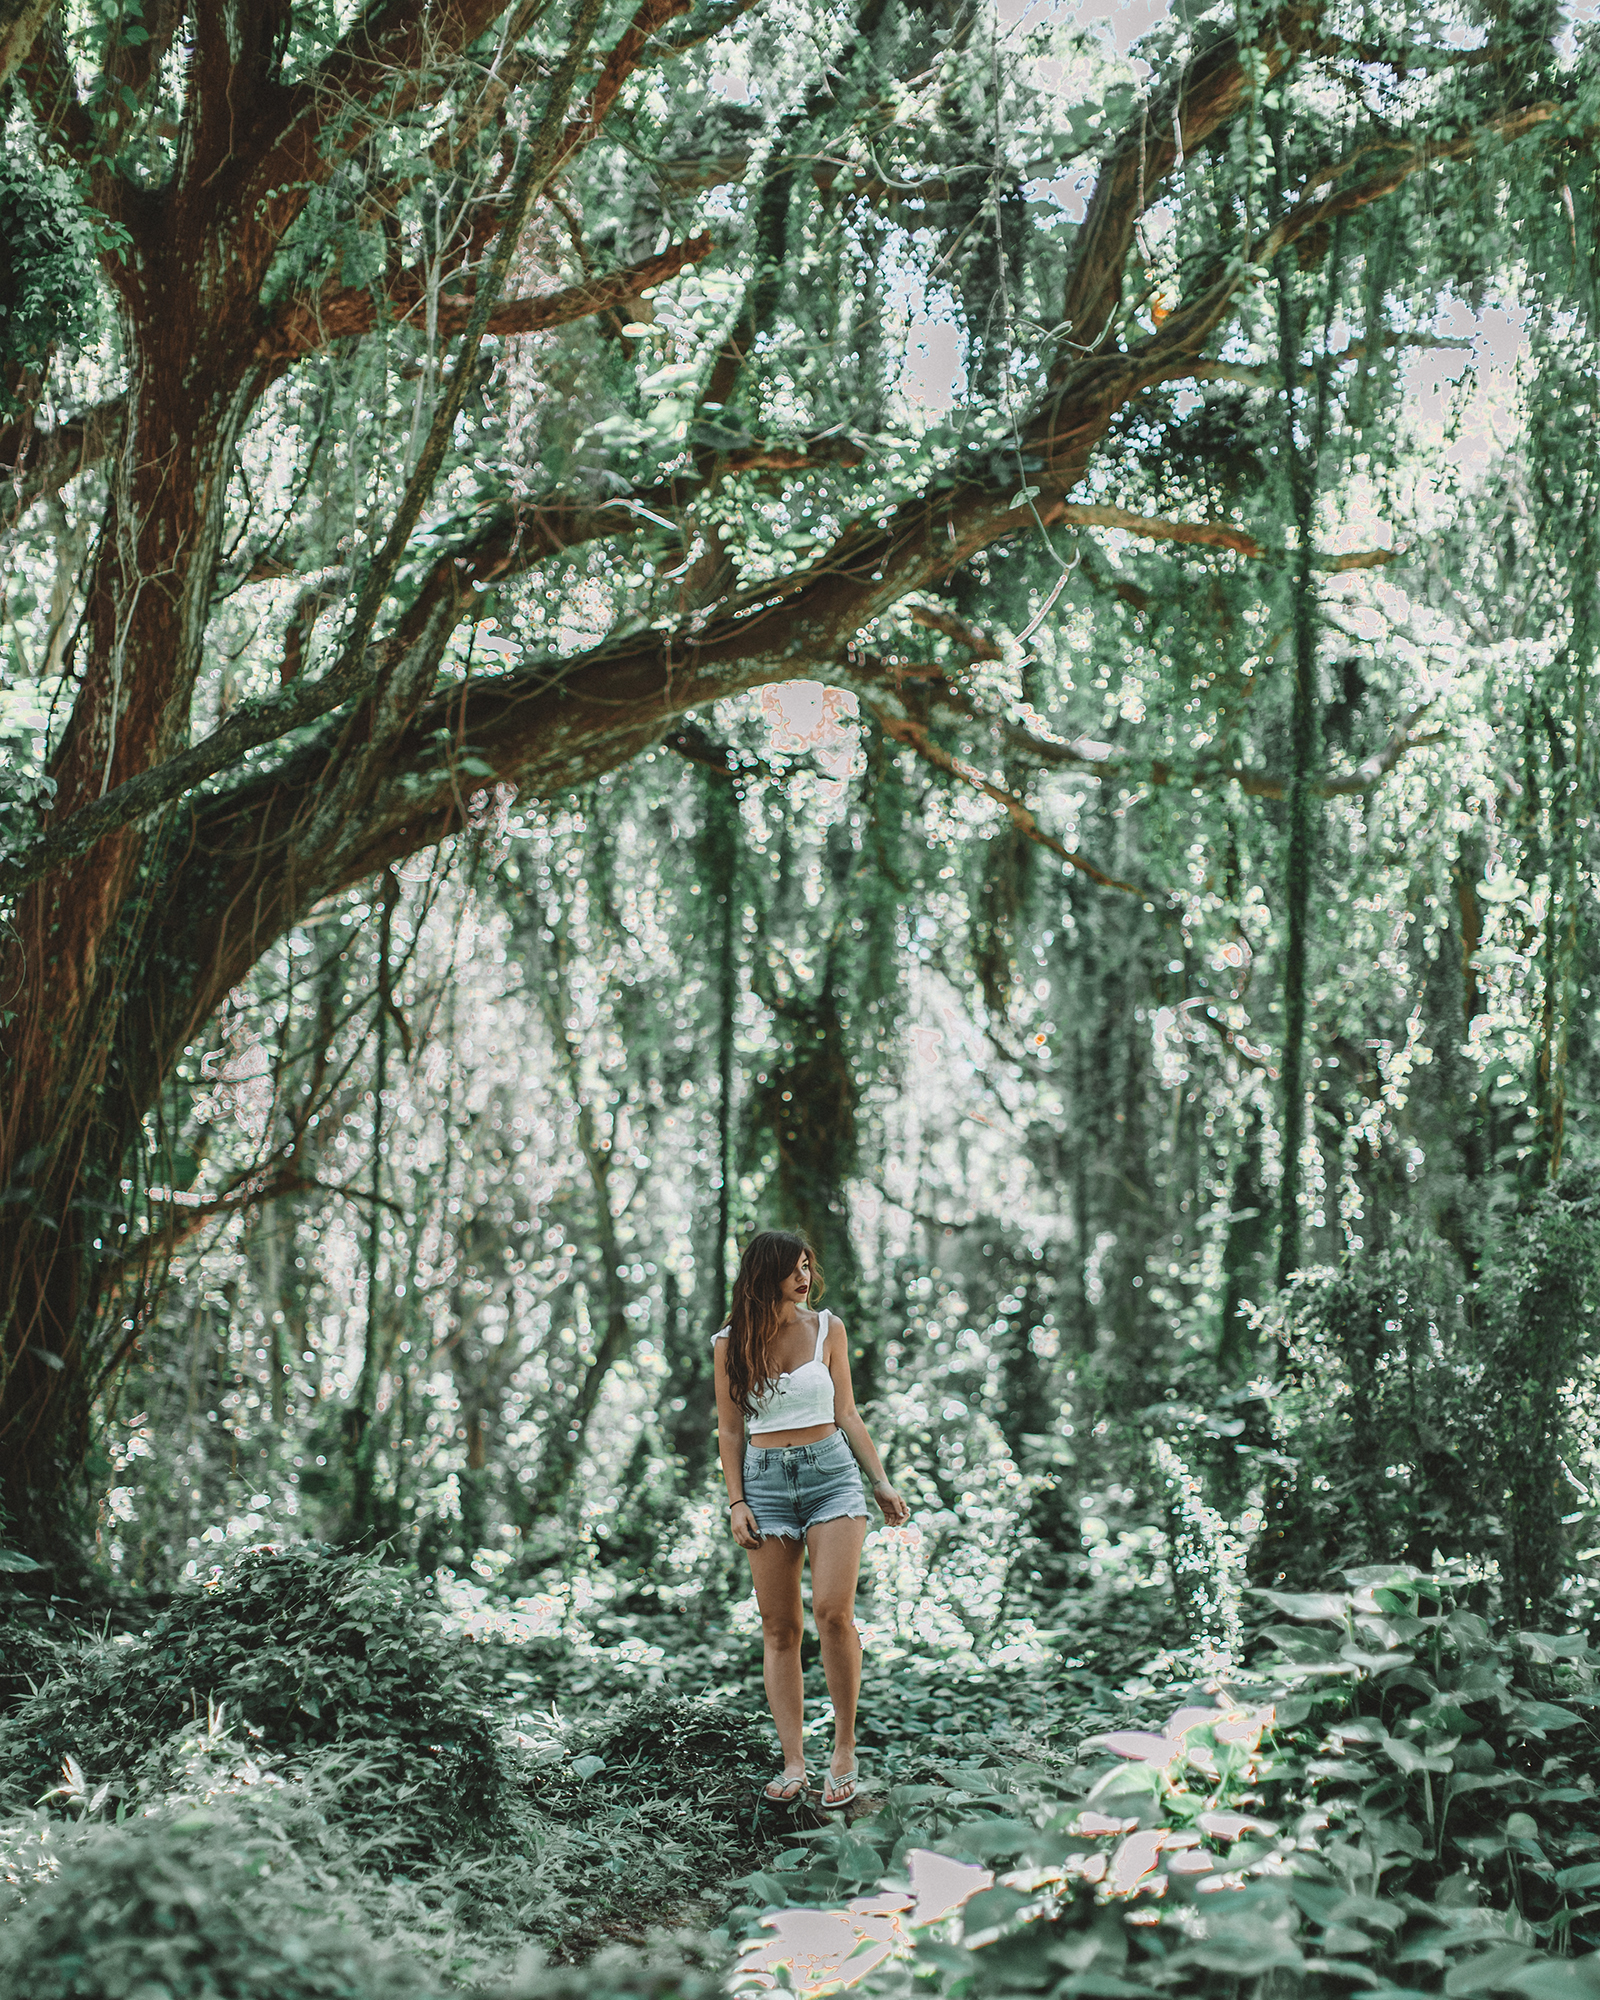
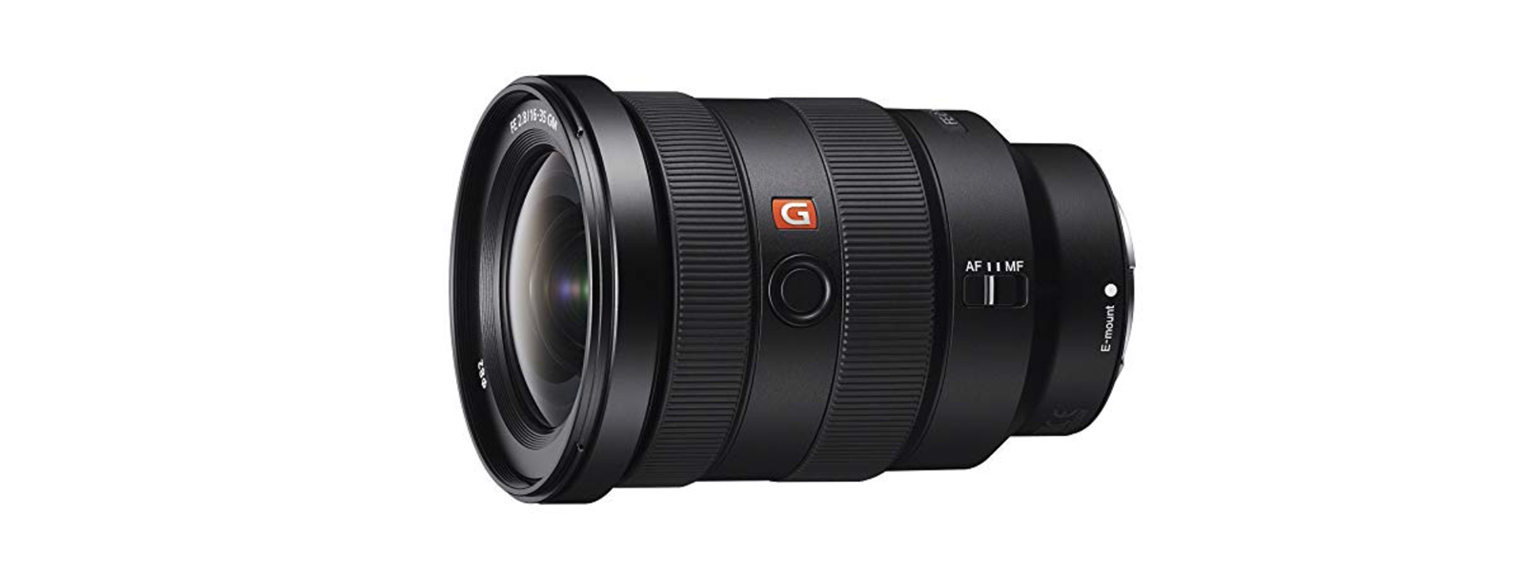
My Most Used Lens: Sigma Art 24mm F/ 1.4
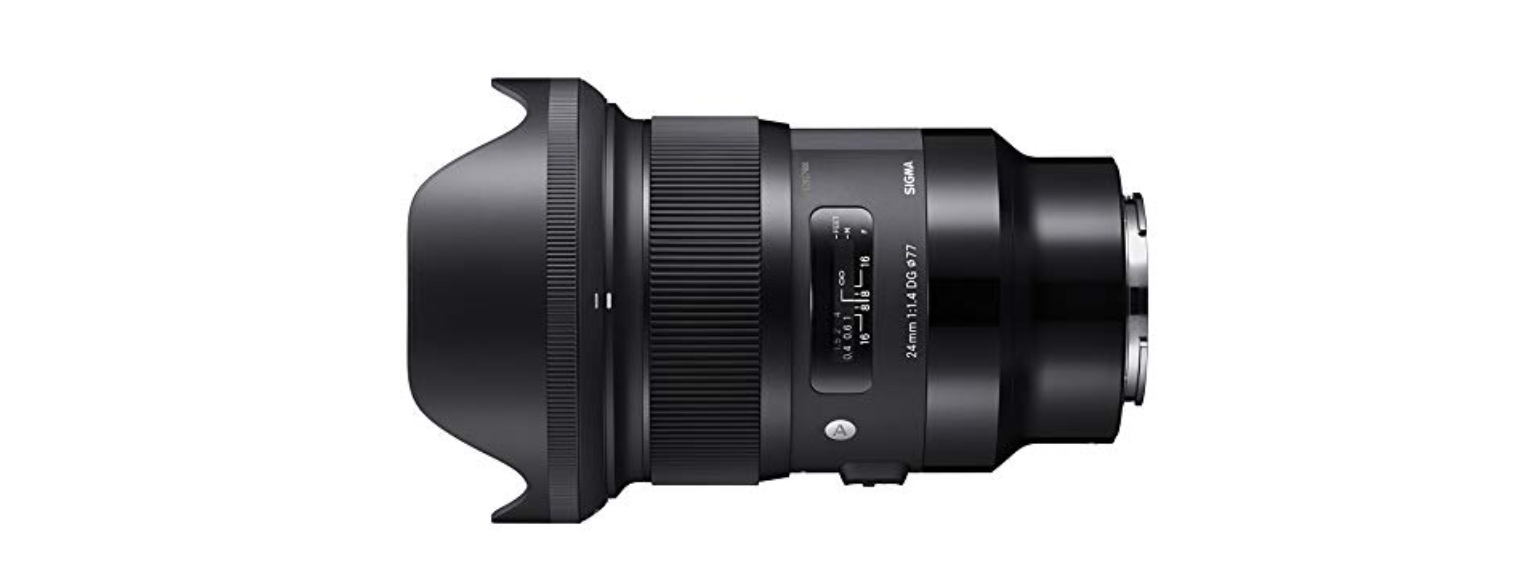
All of my Sony Lenses are prime lenses, as in one fixed focal length without a zoom. While sometimes I wish I had the ease of zoom lenses (we use Zoom lenses for our Canon, which we use mainly for video. A post on our video gear will be coming soon!) I love shooting extremely shallow as much as possible.If you're not as familiar with lenses, the lower the aperture number (the f/1.4), the more ability you have to blur the background - it also gives you greater range to shoot at night or in low light situations. Ever since I started playing with photography back in High School, I always loved a shallow look, and the crispness of prime lenses plus the possibility to shoot shallow has always trumped the expandability of a zoom lens for me.
The Sigma 24mm F/ 1.4 is my #1 pick because of how useful it is for travel and for making the most of tight spaces - and also the great price point of the Sigma Art Series. When we are out for the day, this is usually the lens I put on for it's wide variety of uses. The ability to shoot this shallow in wide angle lenses is relatively new technology, and the results can look really stunning. We have typically only bought native Sony Ziess lens prior to this lens, which are usually about double the price point. However, I have been so impressed with this lens that we are definitely looking into the rest of the Sigma line for future purchases. However, I do always recommend investing in lenses. Good lenses can last 20 years or more with proper care and always have a much longer life than camera bodies - as camera body technology changes much quicker.
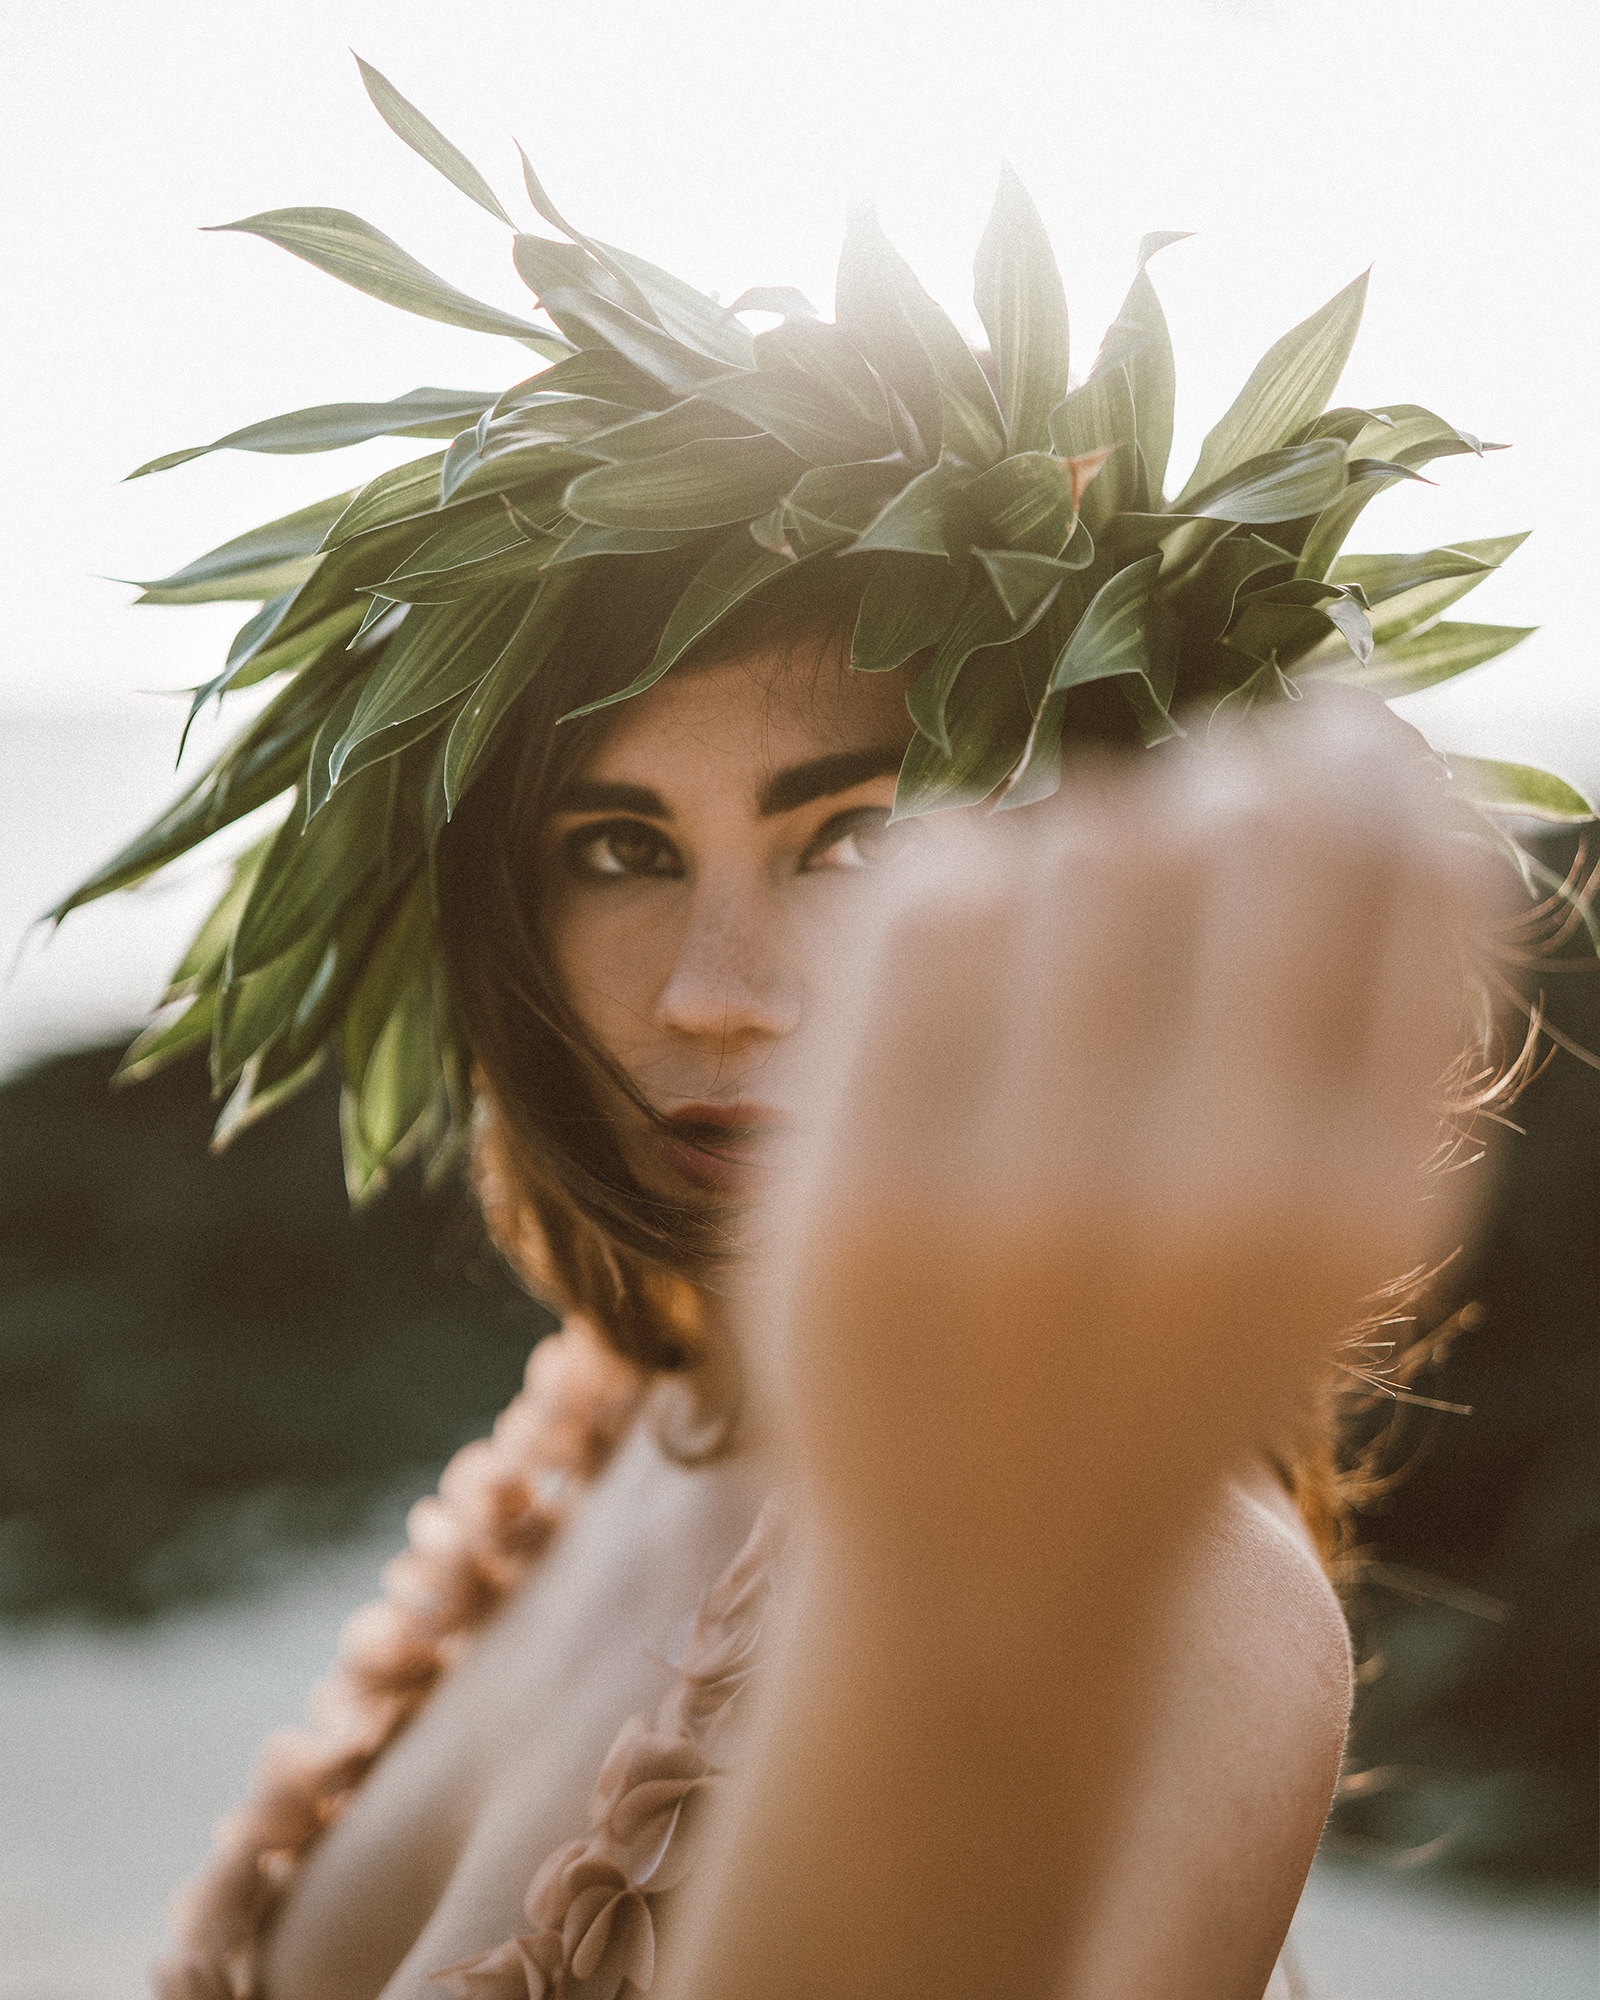
My Other Favorite Lens (It's Very Close Call!): Sony Ziess 35MM f/ 1.4
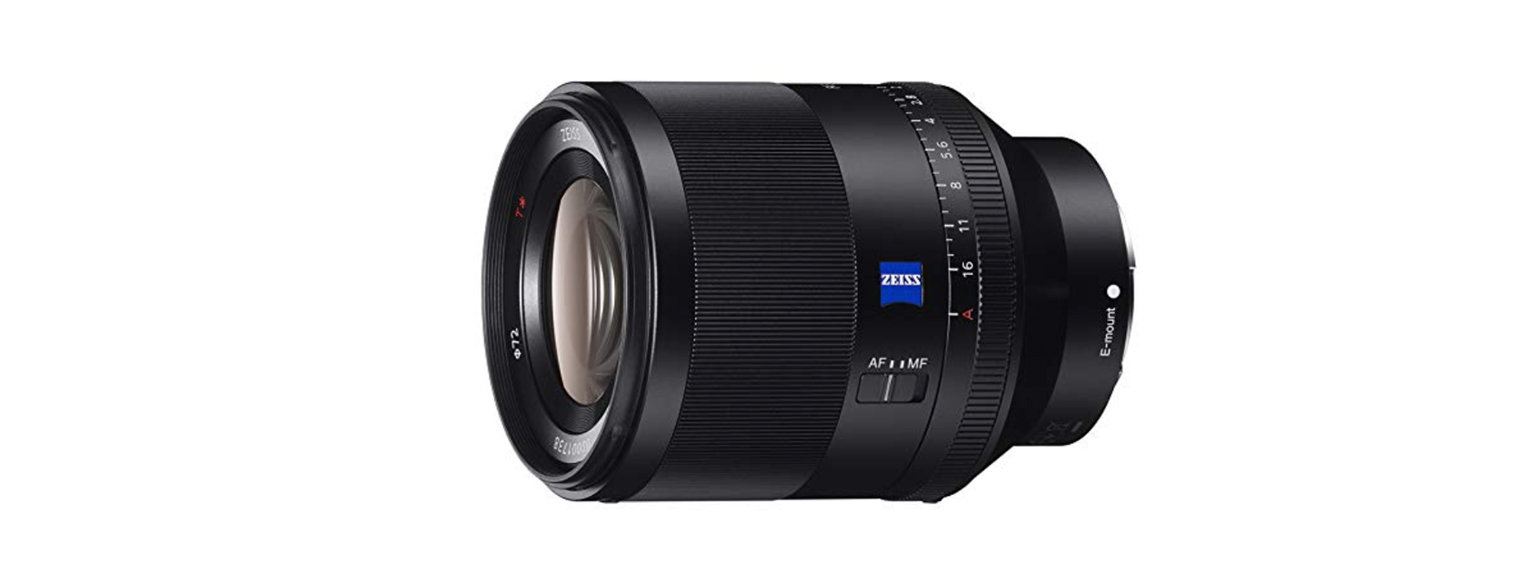
The majority of the time, one of these two lenses is always on our camera. This 35mm is amazing all-purpose lens that constantly creates some of my favorite images. The somewhat longer length than the 24mm has more of a portrait feel and compresses backgrounds a bit more. I have been shooting with this lens constantly the past couple of years and could not be happier; The image quality I have seen from this over and over and over again continues to blow me away. I typically choose this over the 24mm option when I know we will have more room to shoot, when I am planning on getting more detail or portrait images, however the 35mm is wide enough for great all-purpose street photography as long as you are not in too confined of a space. I do really just adore this lens, and often will travel with just this and the 24mm for shorter trips.
If you're looking for a more affordable options, Sigma has a similar lens that I haven't used personally but comes very highly rated, the Sigma Art 35mm f/ 1.4 for Sony.
The Lenses To Round Out Our Kit: Sony 50mm f/1.4 and Sony GMaster 85mm f/1.4


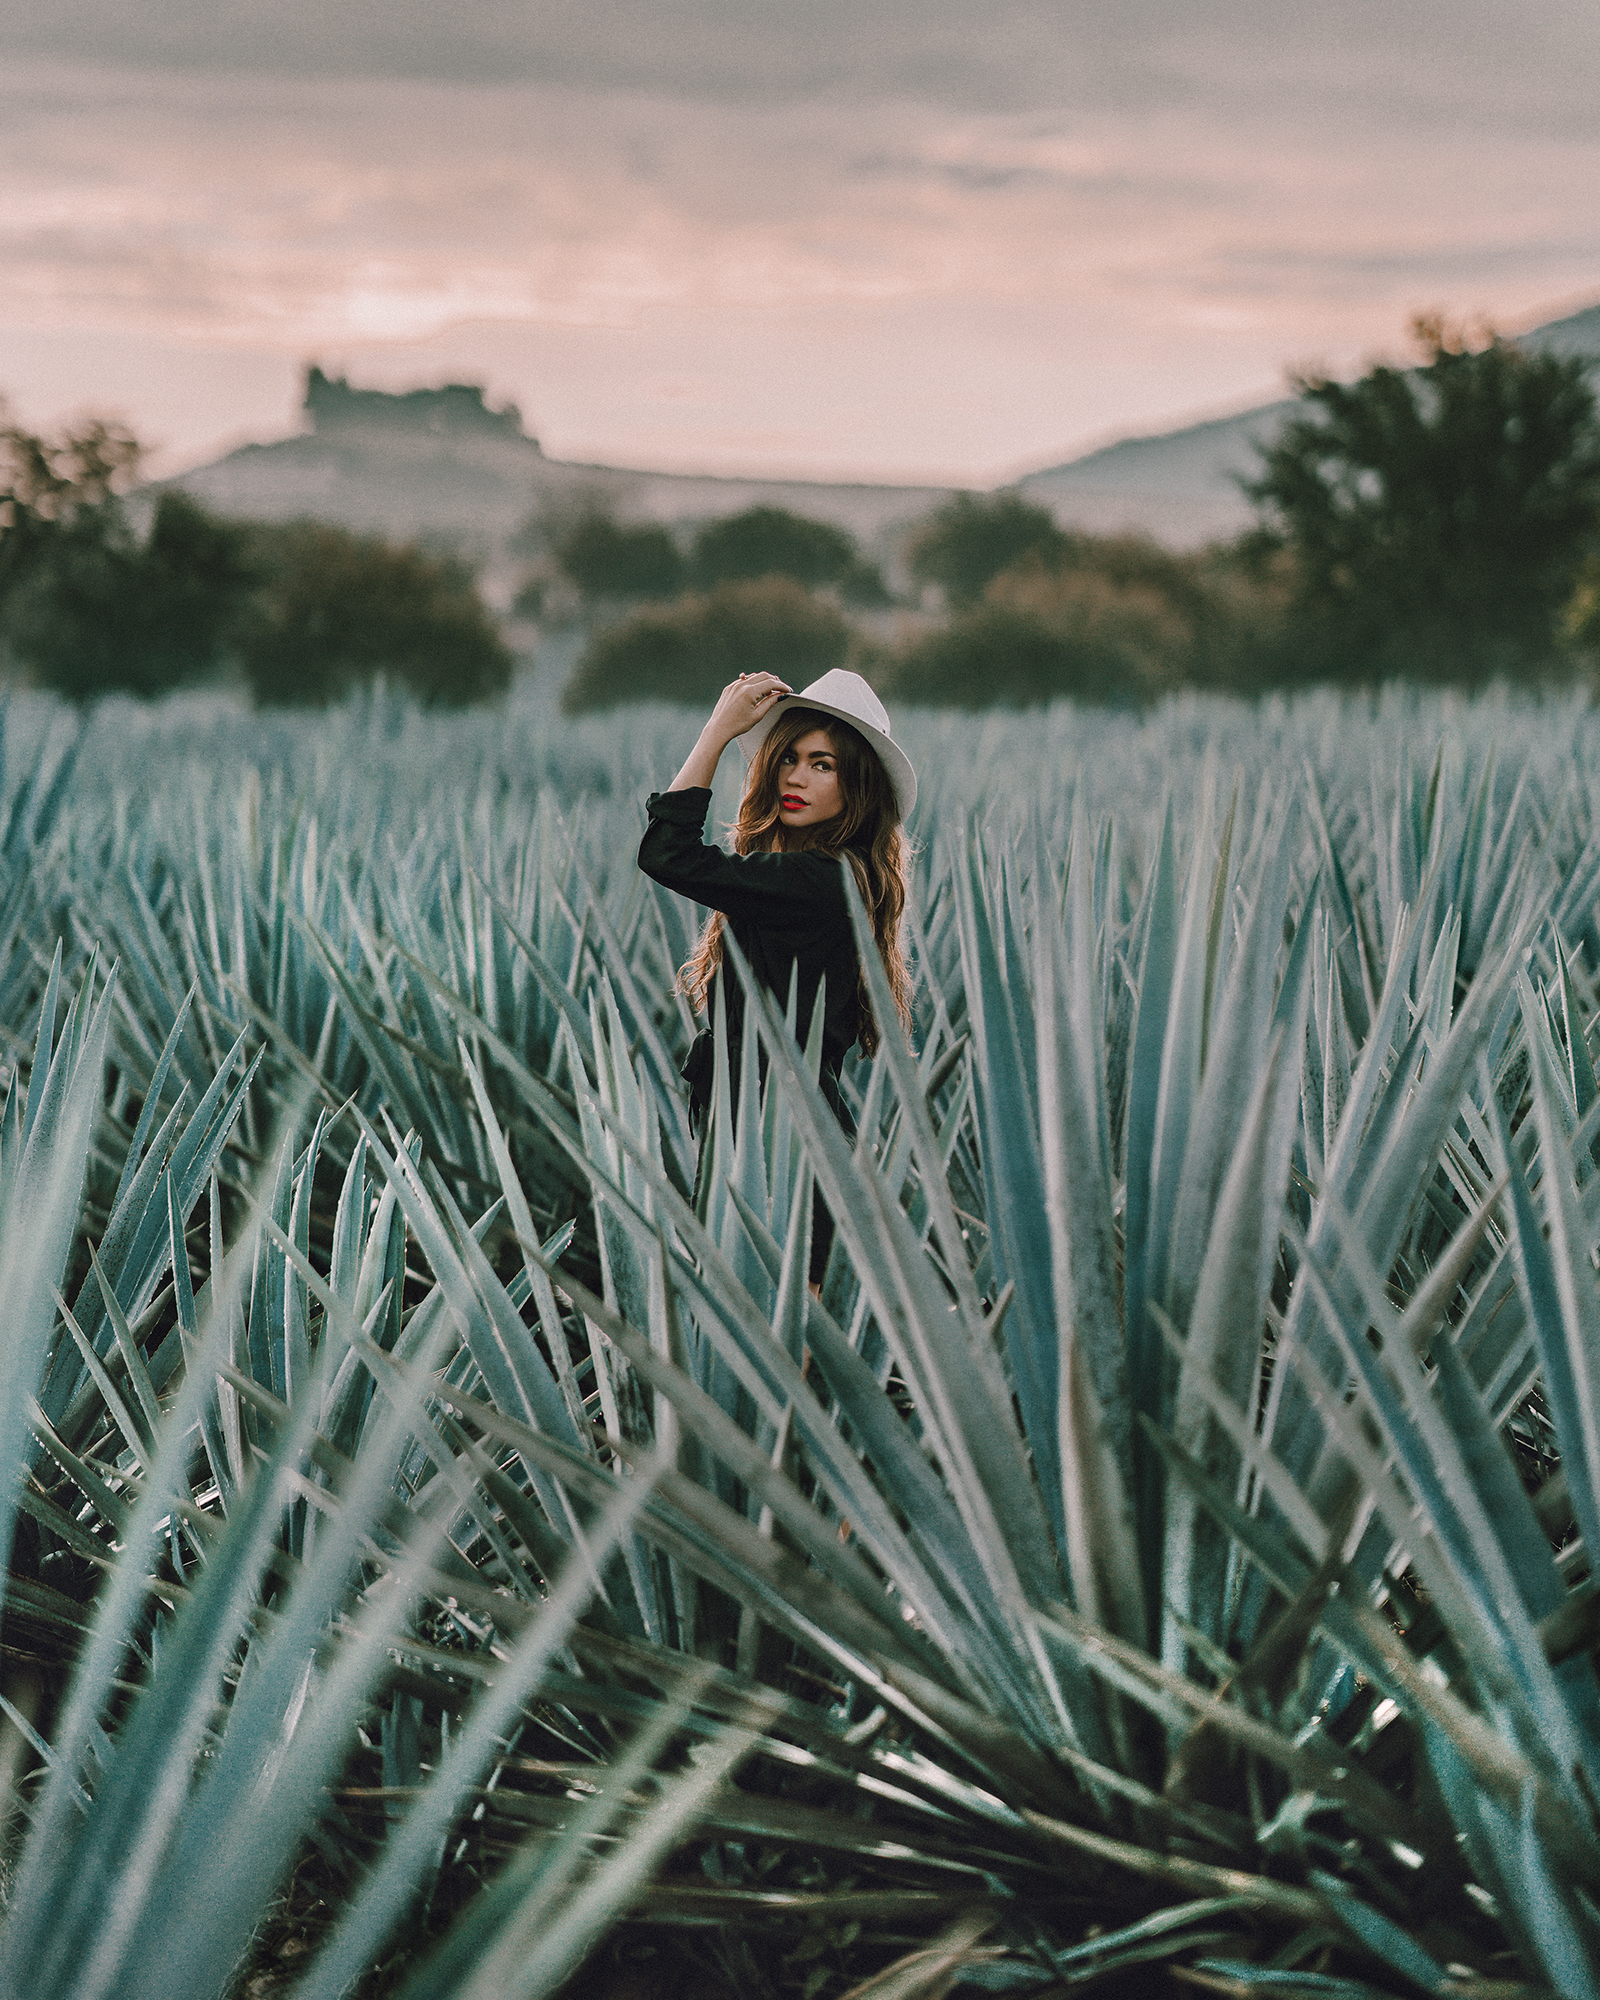
These longer lenses make for amazing portraits, beautifully compressed backgrounds (like making mountains in the distance appear larger in the frame and closer to the subject), and the ability to shoot people or animals at a distance makes for a well-rounded kit. As I stated before, I have always preferred shallow prime lenses to zoom options, although some times I am not always sure if that is the right choice - we definitely never travel light!
The Best Affordable Pick: Sony A7II With 24-70mm Zoom lens

Interested in getting into higher-end photography at a lower price point? This model from a couple years back is an incredibly all-in-one deal for $1000. While this isn't Sony's latest technology, the imagery is still incredible and holds up extremely well. (We still sometimes use our A7RII from 2015 and the images still look absolutely amazing!) A high-quality zoom lens included in this kit makes for a great one-stop-purchase to really start experimenting and spreading your wings with. A huge recommend from me for a great value camera!
The Camera Bag We Can't Live Without: InCase DSLR Pro Pack Backpack
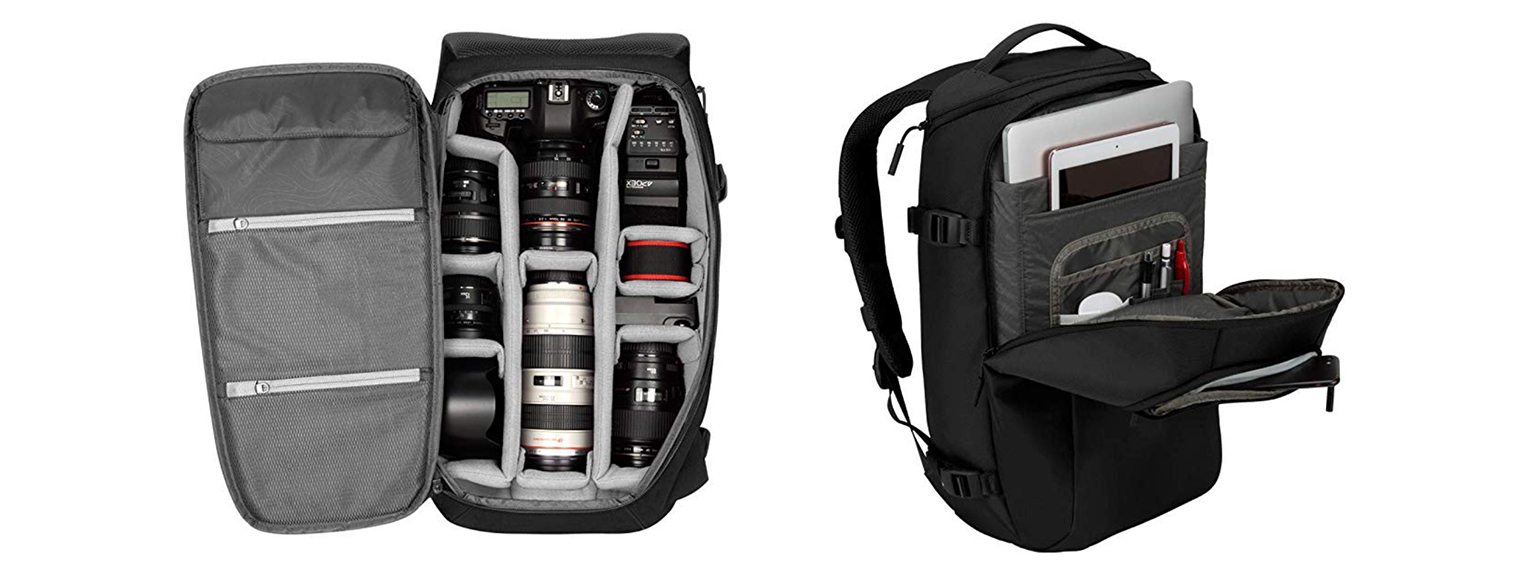
We have typically always gone with InCase for our camera bags and carry ons and have consistency been big fans of the brand. We've had a few of the bags for 5+ years now with no complaints - and in particular this DSLR Camera Pro Pack has been an amazing home for our gear all across the world the last few years. It's customizable, large enough to fit multiple bodies and lenses in, and the laptop sleeve actually fits our 15" Macbooks easily - unlike most backpacks I have tried. There is a side strap for a tripod, and a zipper from the top for easy camera access when you need it. But one of our favorite features is that the main compartment zipper is pressed up against your back when wearing, so someone cannot just come behind you and unzip, which makes us feel much more secure on the road. This bag also fits very snugly into half of an Away Bigger Carry On Suitcase - the way we usually pack it for extra security. 5 stars from me!
In the recent years of most airlines weighing carry-on suitcases, being able to securely hold most of our camera gear on our backs in this lower profile backpack has been a huge deal for us.
The Only Hard Drives We Trust: Lacie Rugged 4TB Drive
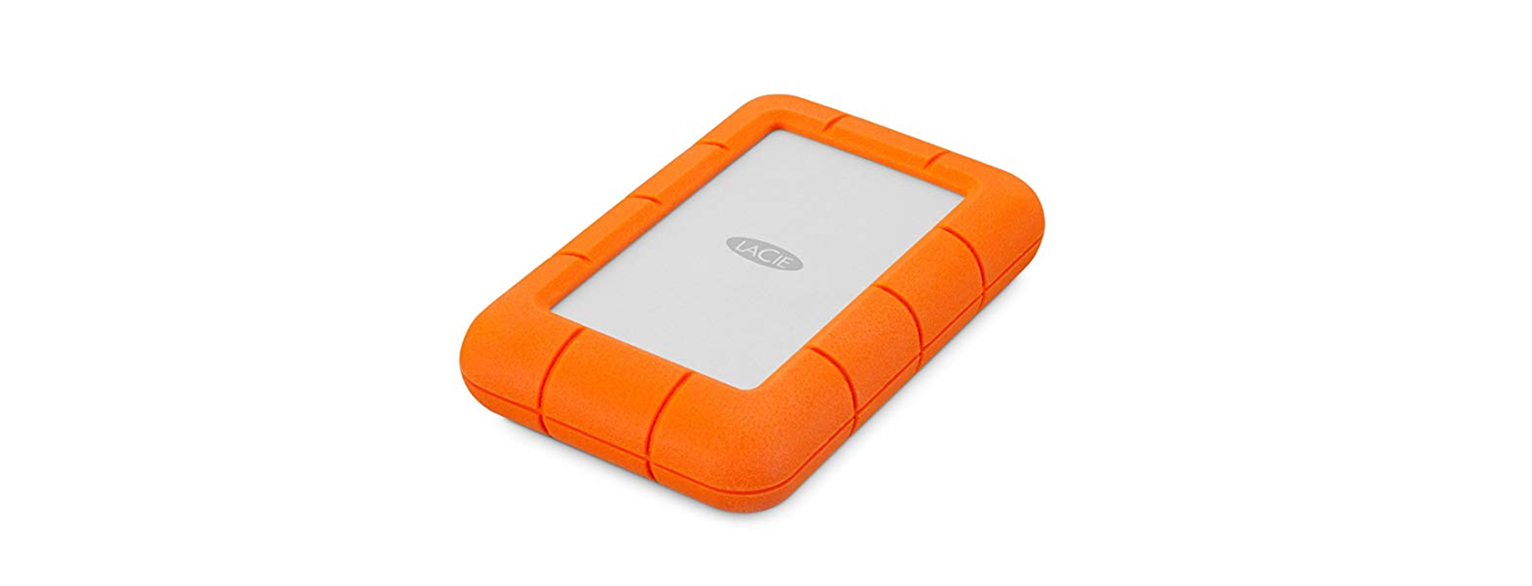
If you have ever been on a commercial photography or film set, these are the only external drives you will ever see. The Lacie Ruggeds are industry standard for a reason - they are simply the best and most reliable. Over the years I have had multiple hard drives fail, or get bumped off of tables and stop working, or meet other untimely deaths - but we have never once in our years of travel had issues with these. Because of how much we shoot, we have cases of them in our apartment and Brandon never has any less than 8 on his desk at once. Don't bother looking into cheaper options and trying to make them work, if you care about your files, this is hands-down the best way to store them. Available in sizes from 1TeraByte to 5TeraByte here.
Media Storage Made Easy: VKO Memory Card Case

So, storing and keeping track of your SD cards and camera chips isn't exactly a very fascinating topic, it is an important one. We found this little case for less than $10 on Amazon last year and it has just worked great: sturdy and water resistant, with a secure closing snap. And it holds multiple chip types which is super important to us (SD, mini-SD for Drones and GoPros, and CF, if that's what you're in to), plus a SIM pin. It's one little solution that definitely made life easier.
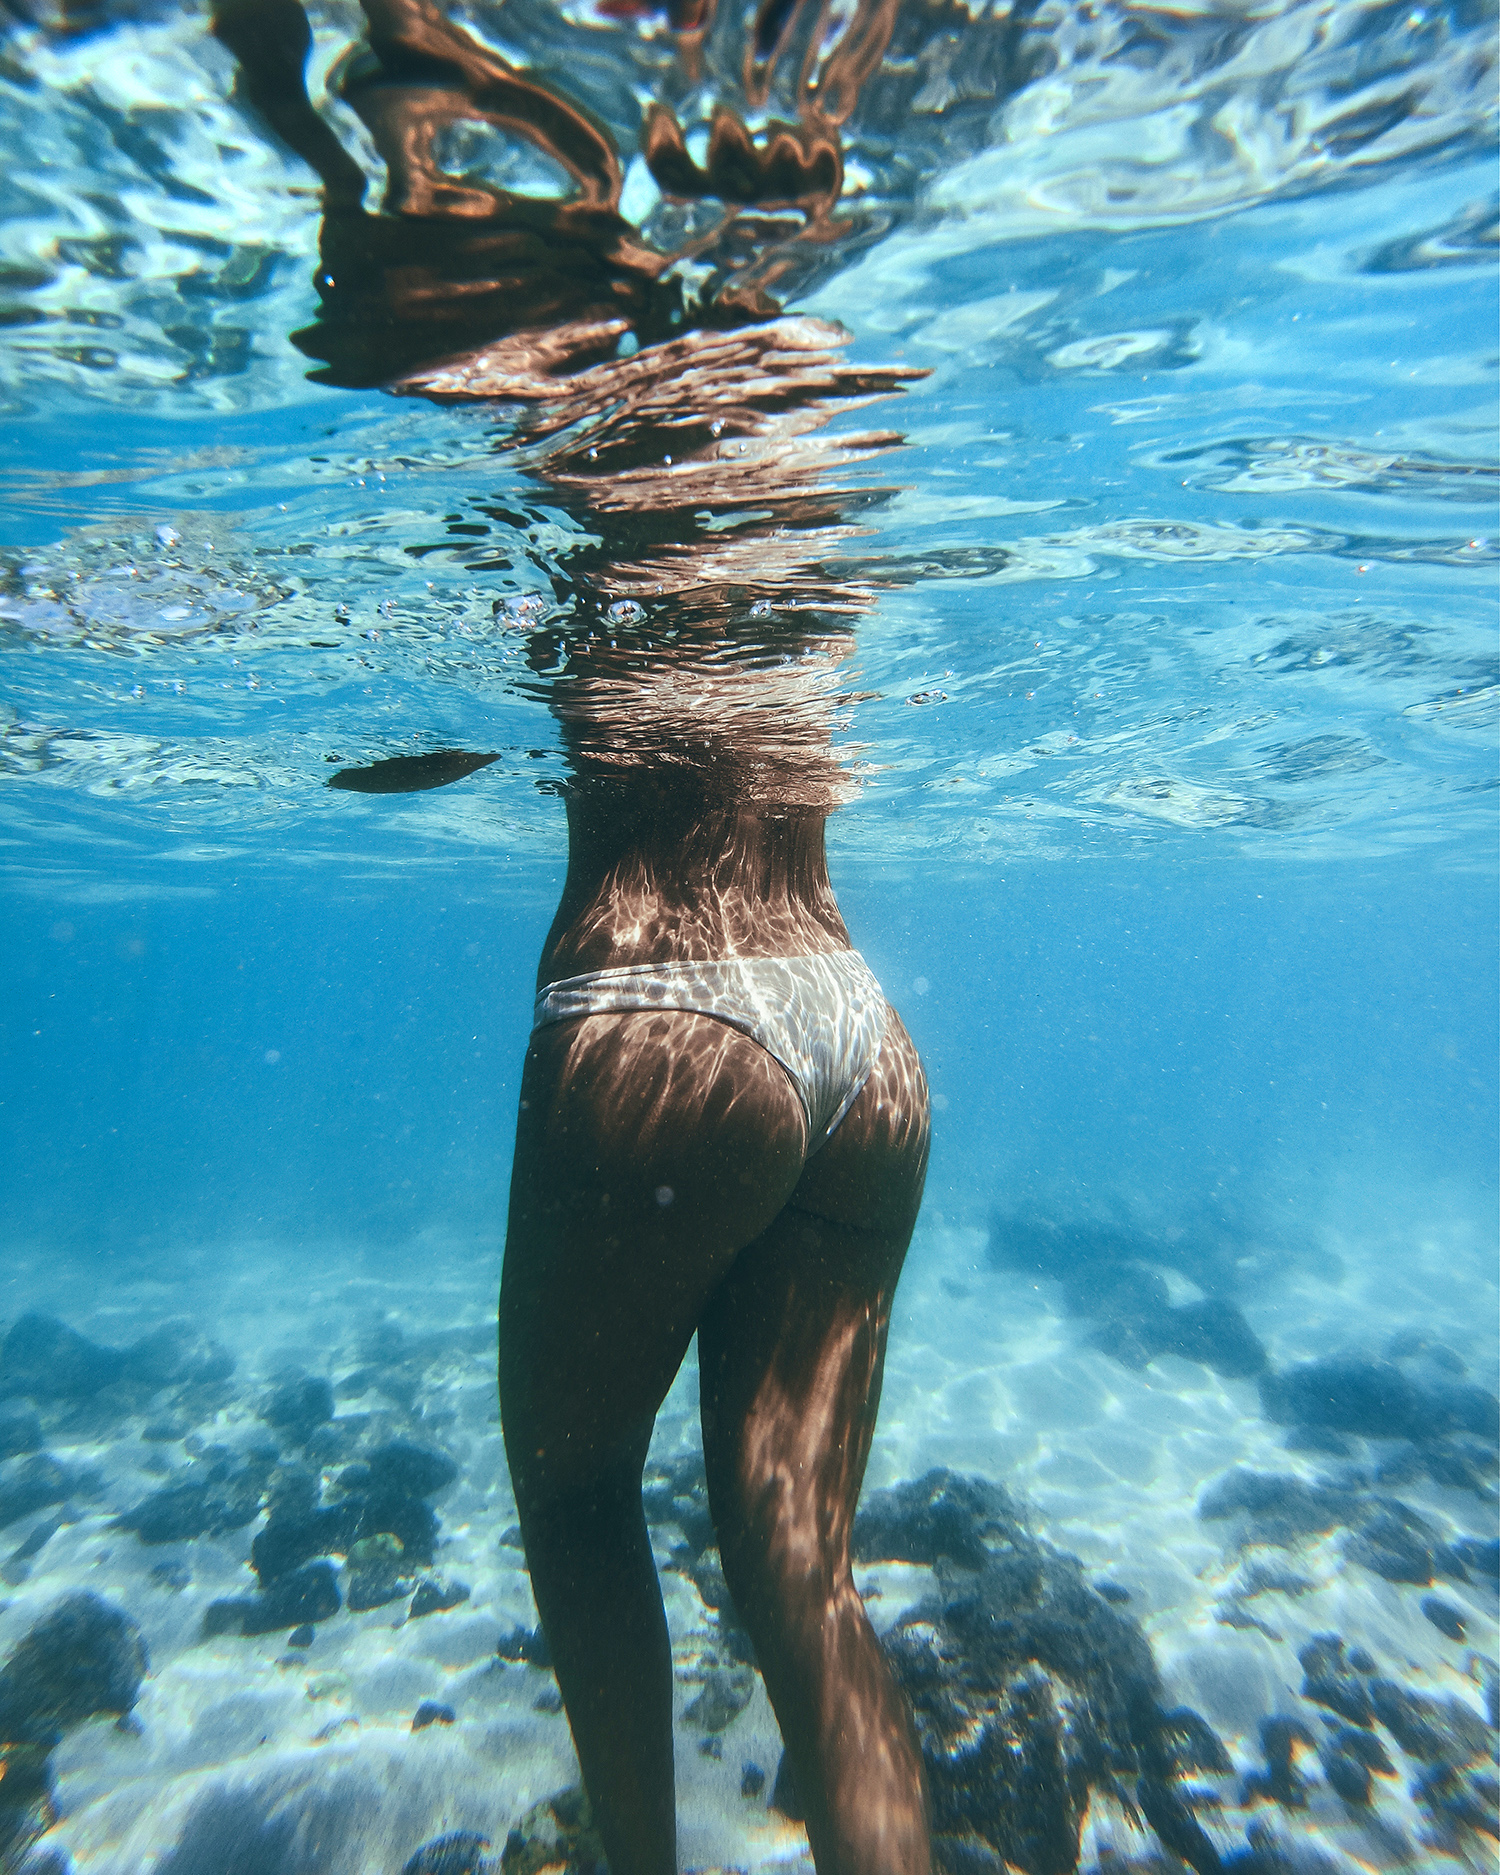
Underwater Housing: Aquatech Imaging A7R Housing and Dome
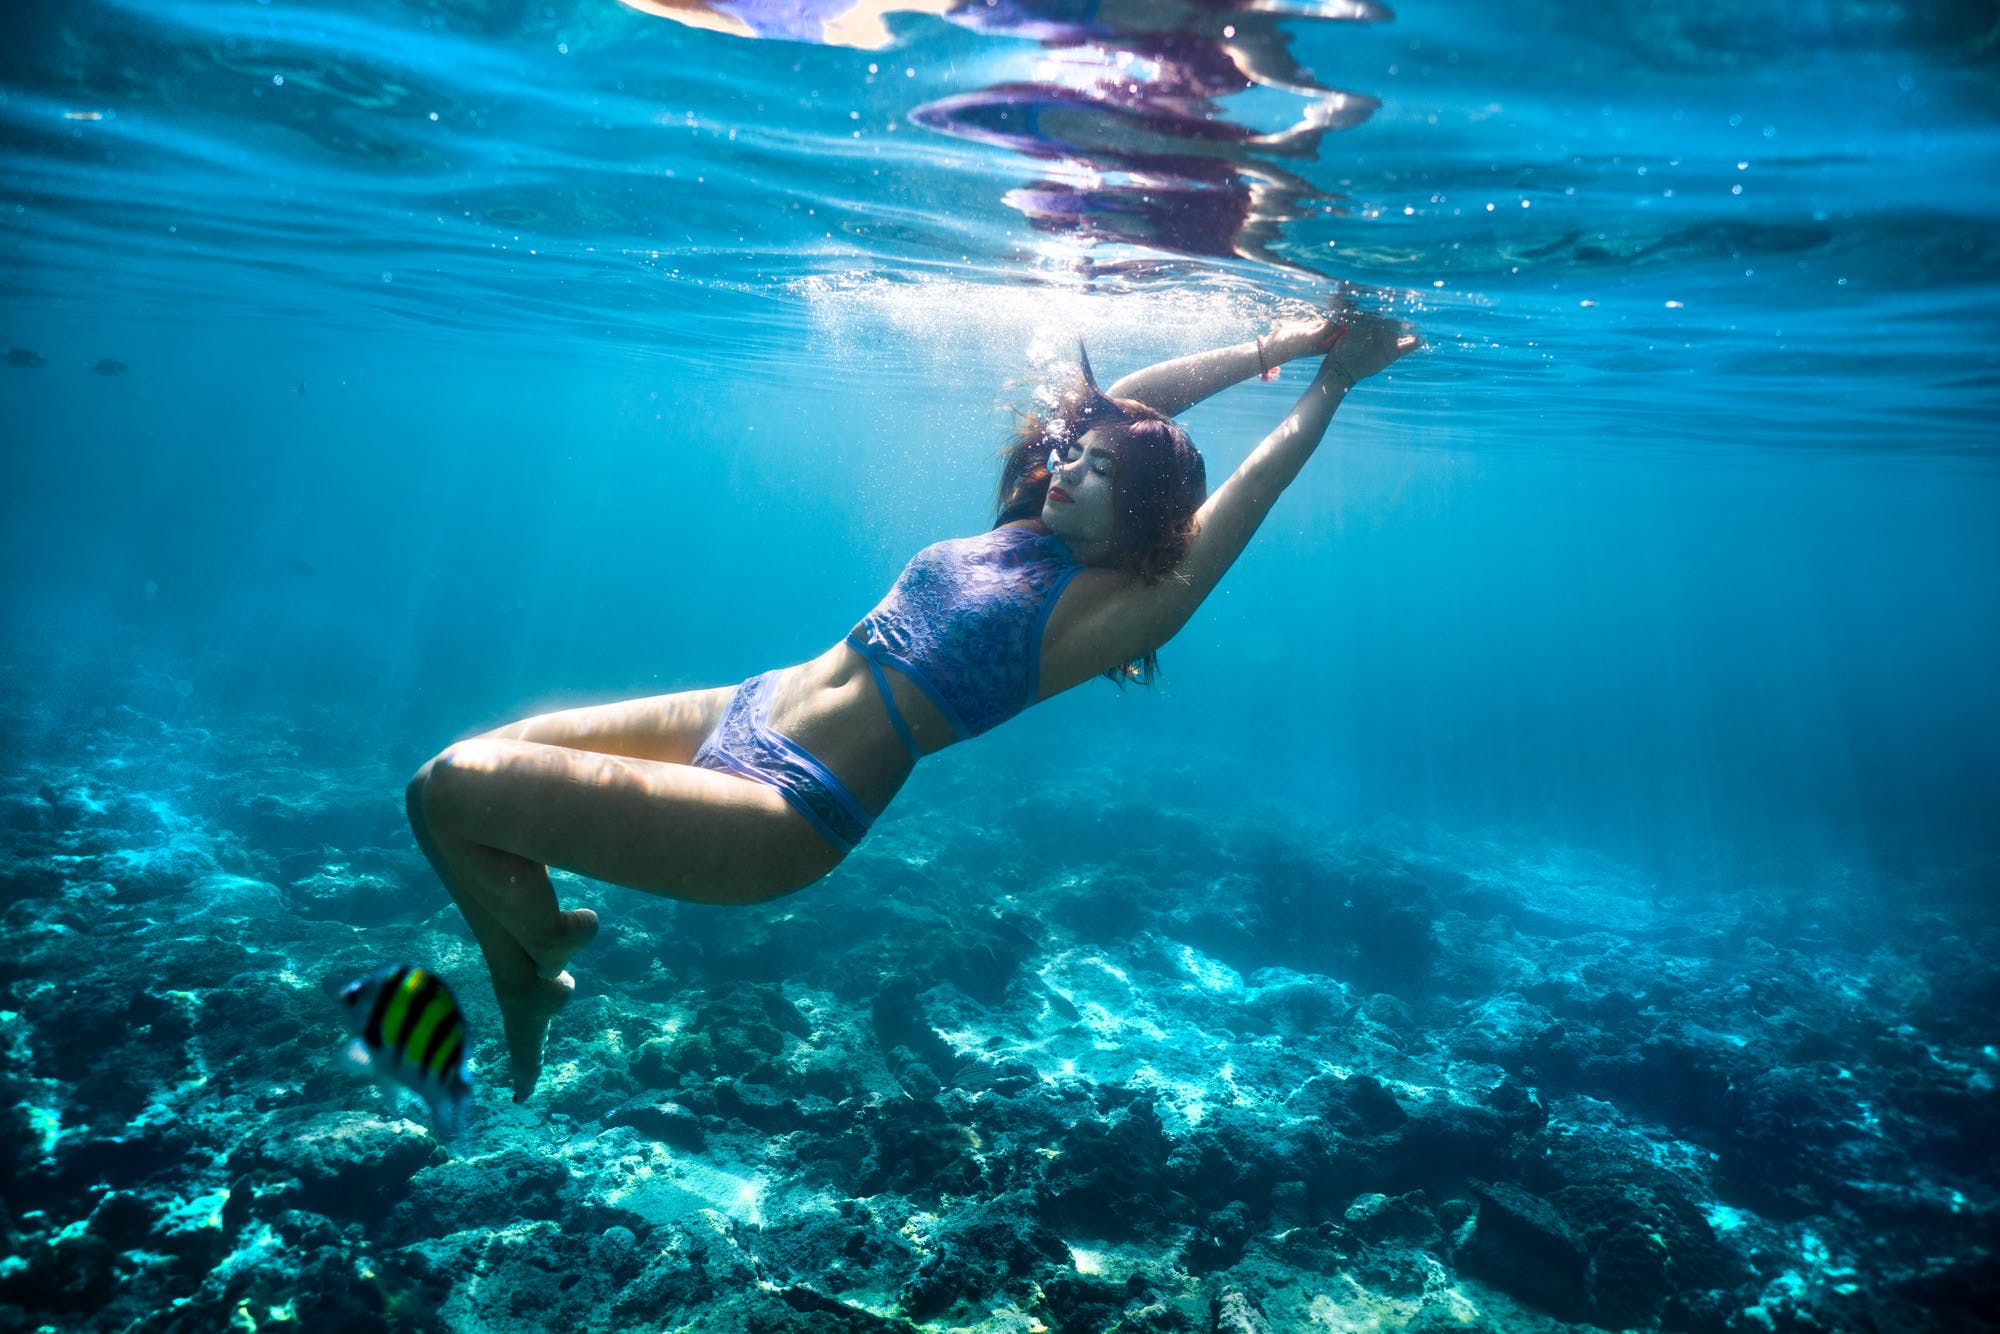
Shot on Sony A7RII with Aquatech Housing
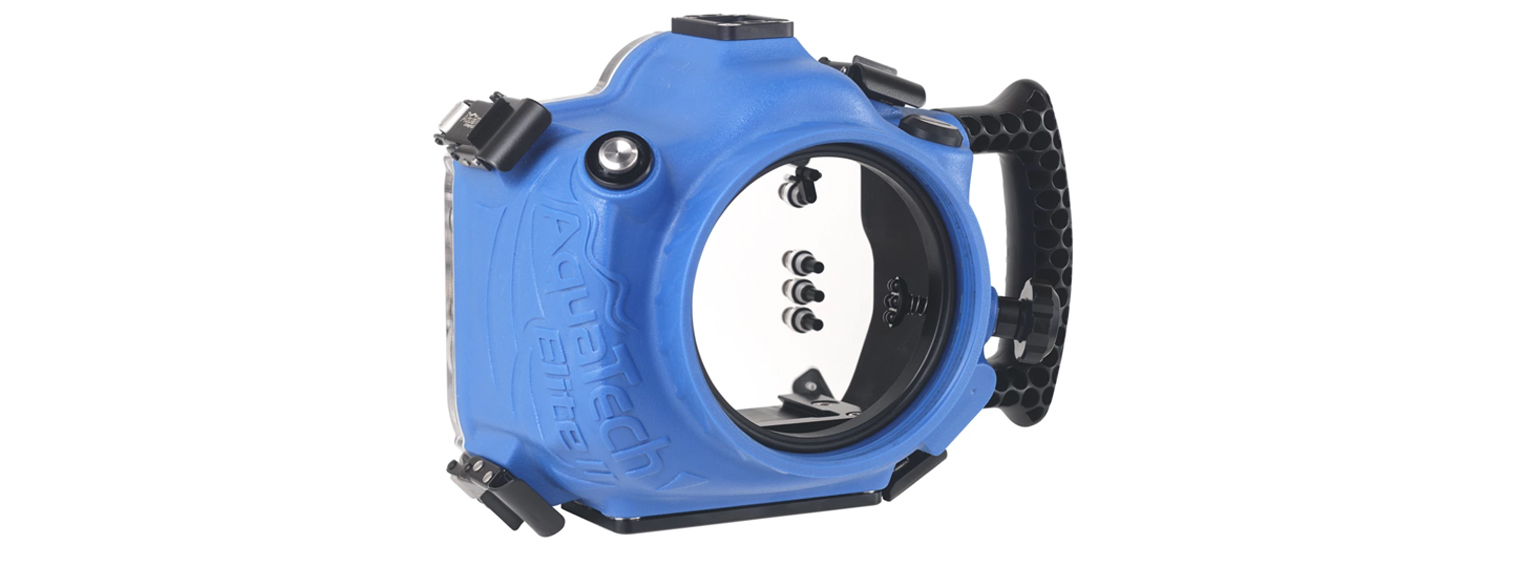
We our deep love for all things tropical, when we started filmmaking, getting a solid underwater housing was very important to us - however they are never easy. Shooting underwater is difficult, expensive, and bulky to travel with. Not to say that we haven't been happy with our Aquatech over the years, but to be honest, it's a large commitment. The kit is at least 5-8 extra pounds of weight, must be packed very carefully, and water is still tricky to shoot in even after doing it for so many years. However, when you can capture it well, the results can look so incredibly beautiful and feel game-changing! I love the ability to shoot above and below and really expand worlds with our imagery, but you generally need to be really sure it's a commitment you want to make before investing.
An Easier Underwater Option: GoPro Hero 7 and Dome
Shot on GoPro Hero 7
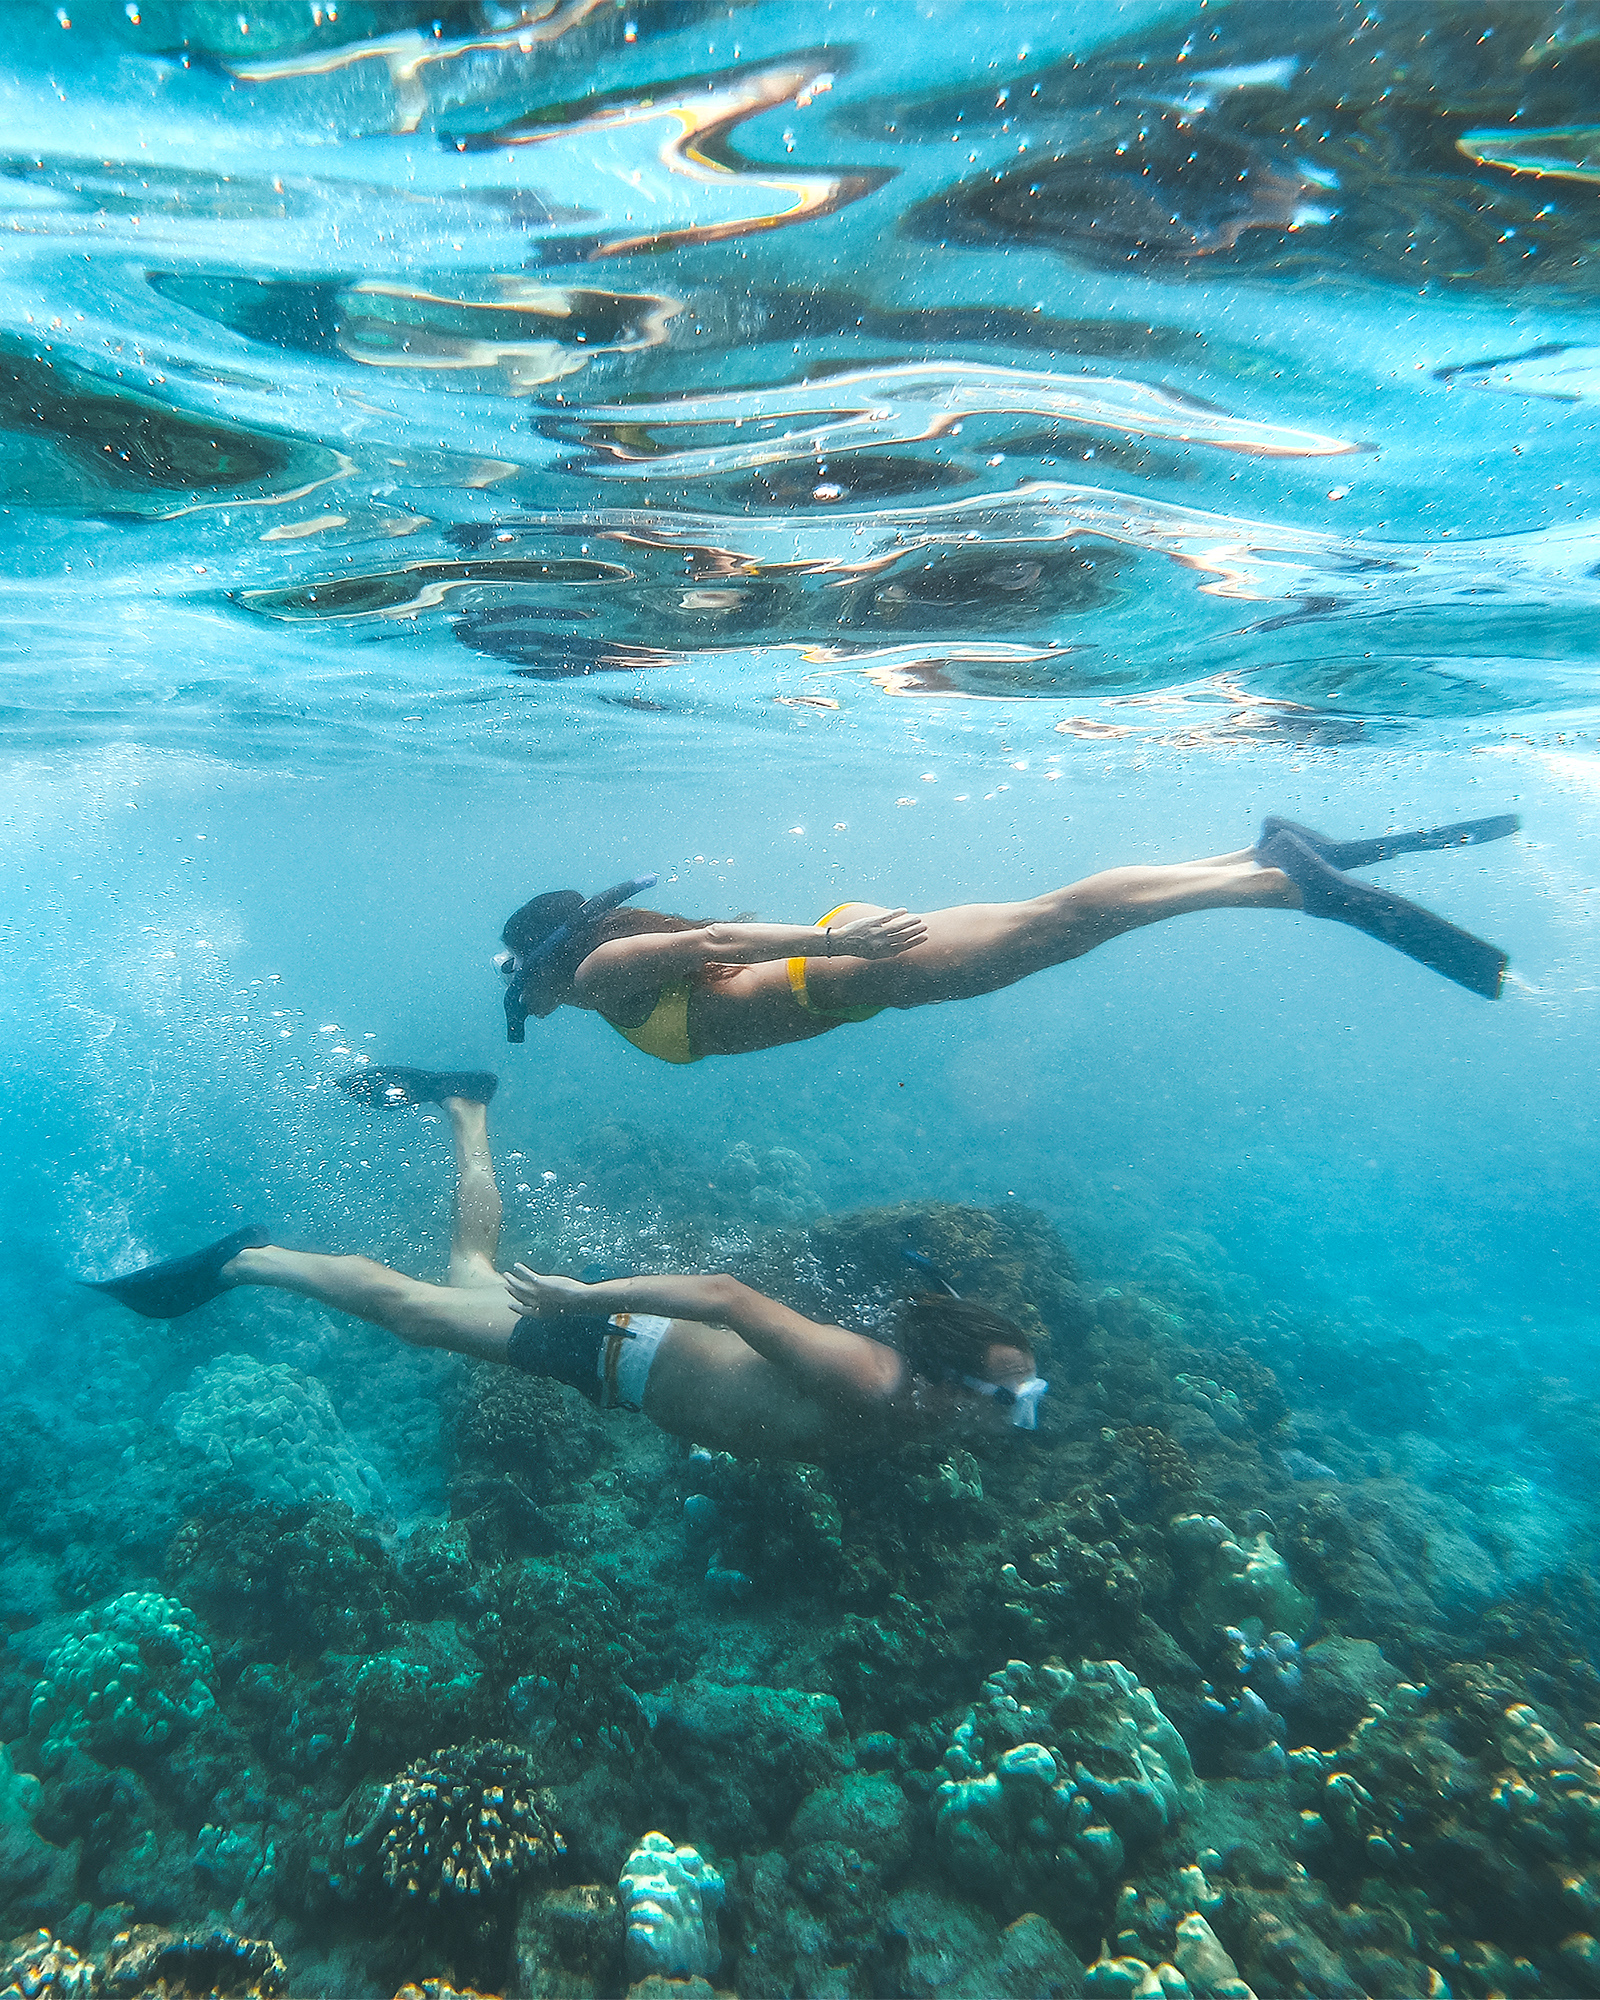
Shot on GoPro Hero 7
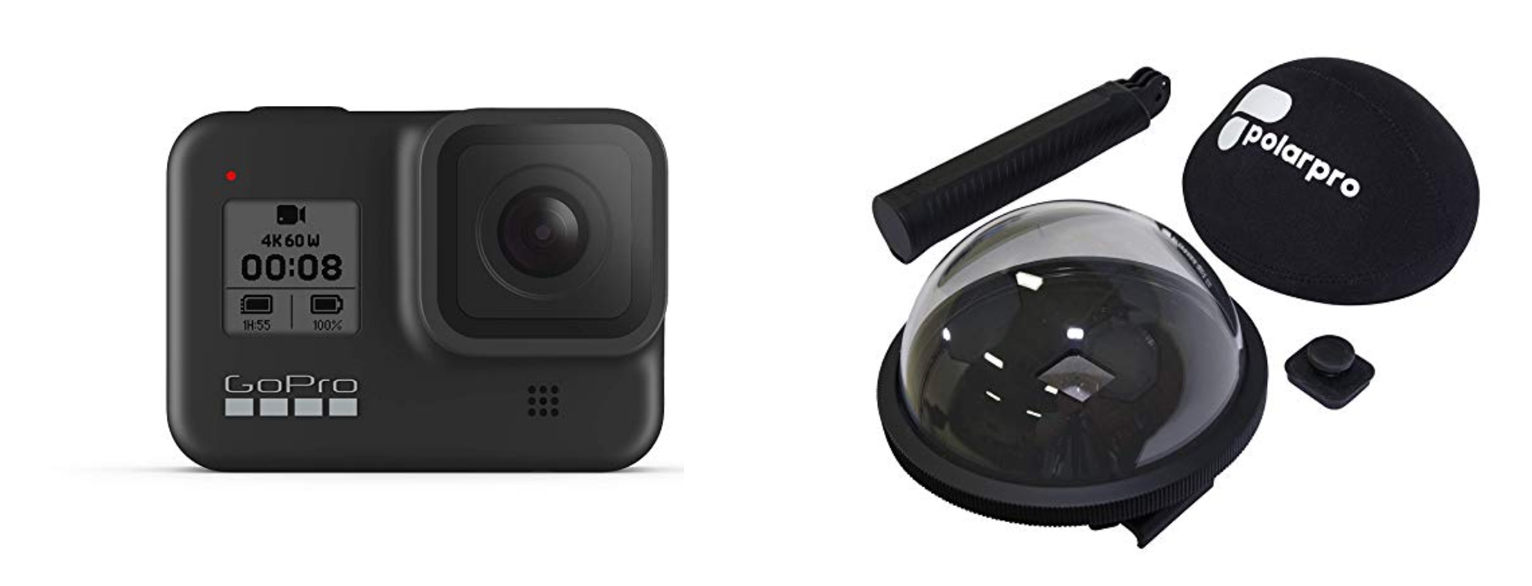
While there are certain qualities (depth of field and dreamy shallow images) that you will never be able to capture on the ultra-wide, ultra-sharp GoPro, it is an incredible value and and a very powerful tool in a teeny-tiny size. We have continually been impressed with how great jumping and swimming shots pulled from this camera can look - and a $50 additional of the PolarPro dome port (this is the one we use, and it's great!) can create the same over/under effect that you used to need to spend thousands on with a larger housing. A GoPro is so easy to bring with you literally anywhere, regardless of how lightly you travel, and is a must in every adventure traveler's bag.
The Best All-Purpose Drone: DJI Mavic Pro 2
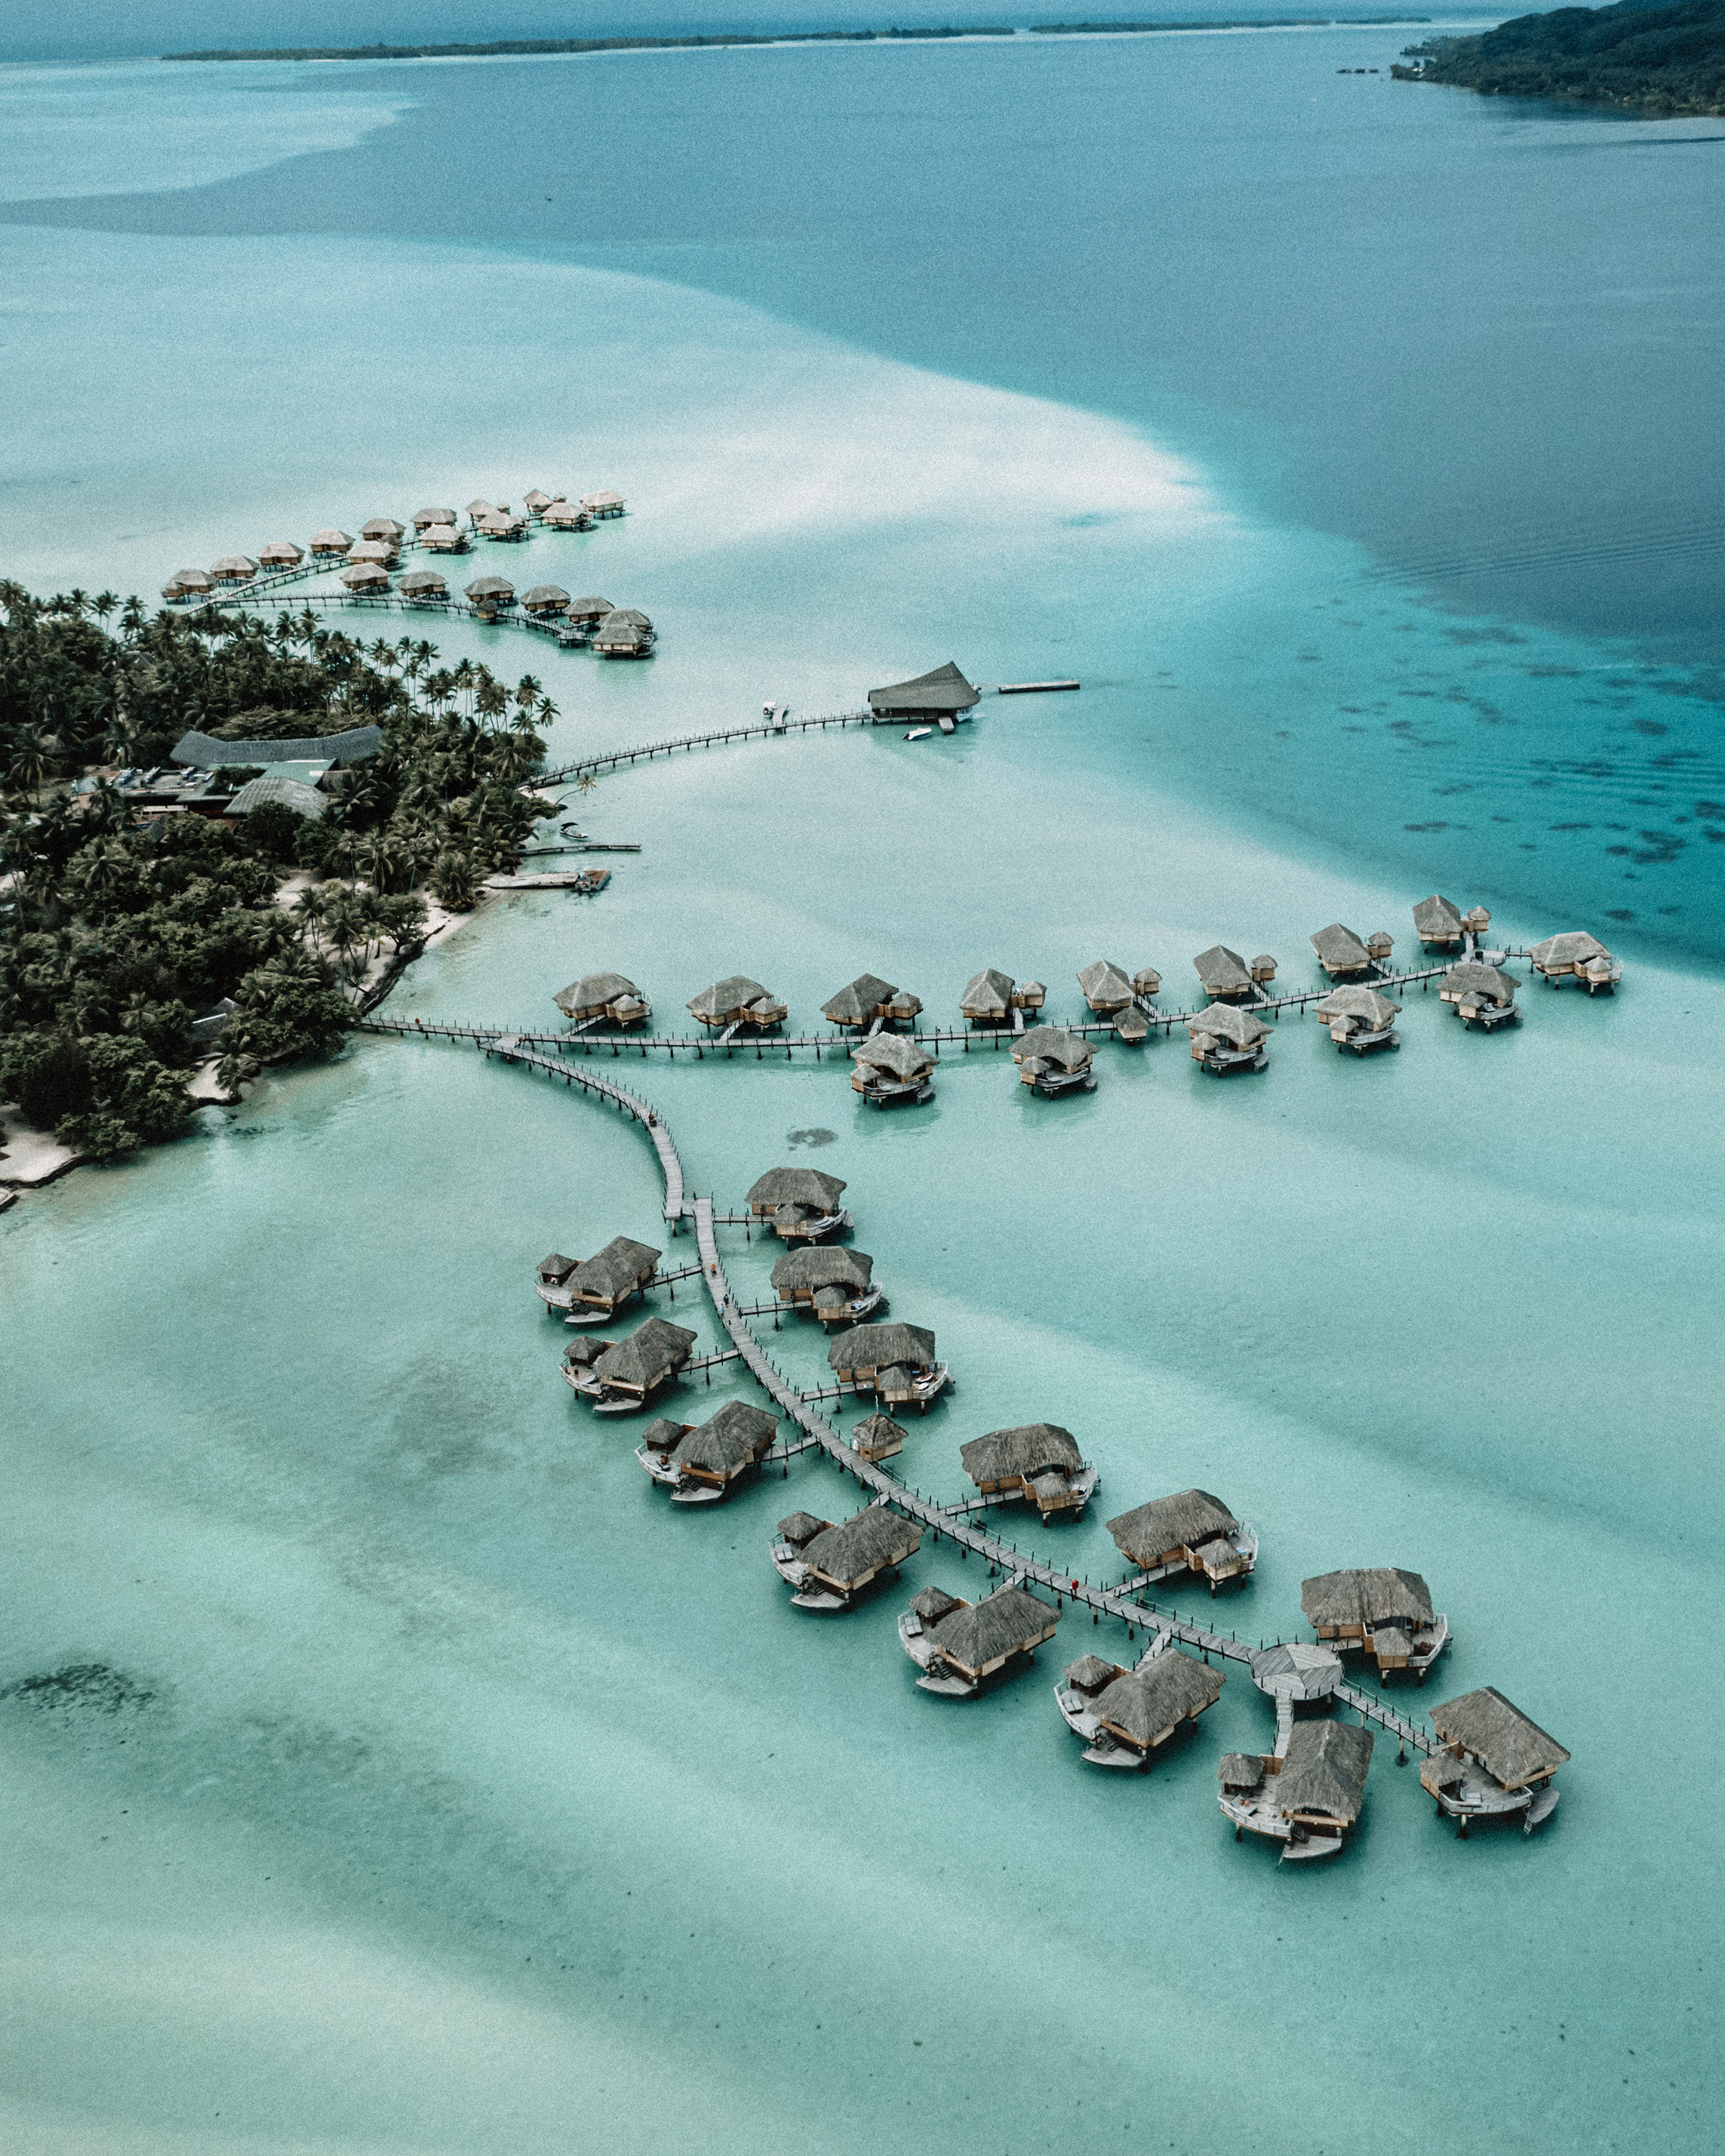
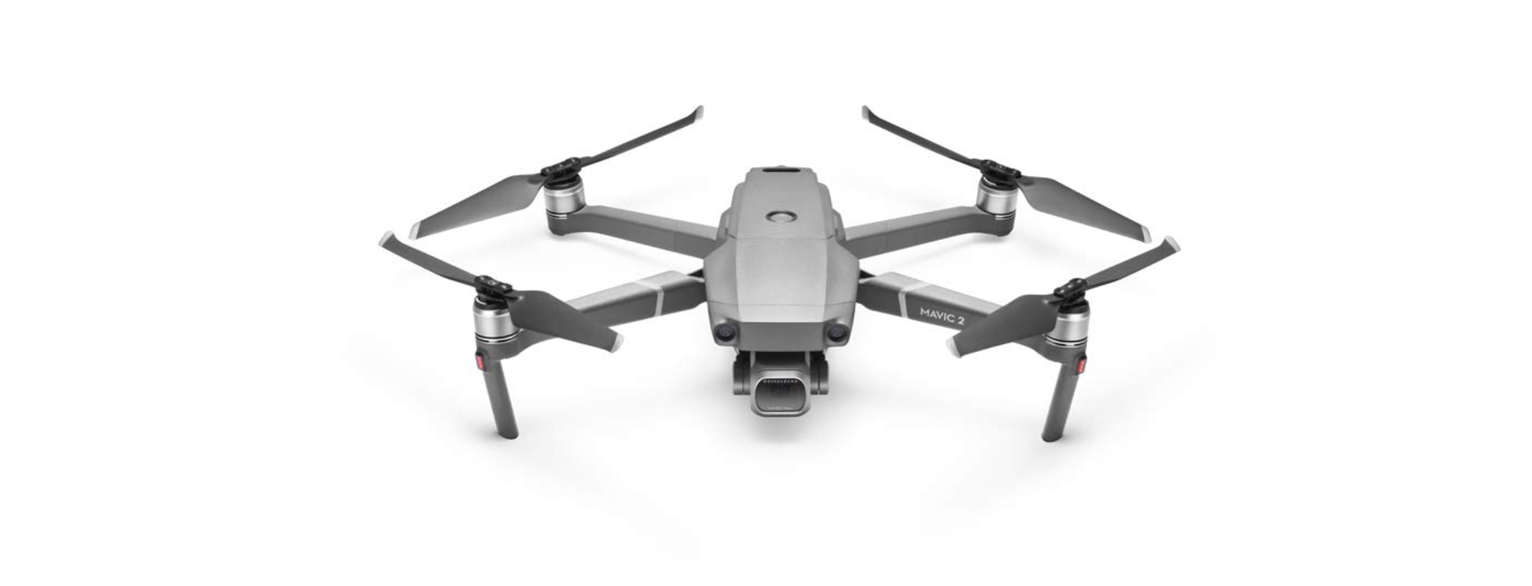
We have shot a LOT of drones over the past 5 years - from the Phantom 2 that needed a GoPro soldered to it, to our massive Inspire 2 Cinema Drone, and The Mavic 2 Pro has been the most stable travel drone from DJI we've had to date. It builds on the strengths of the Phantom and first generation Mavic Pro line with great stability (even in decent winds), good speed and 4K camera resolution all in a small travel friendly package. This drone essentially replaced both our Phantom 4 Pro and Mavic Air, as it merged the higher quality cameras from the Phantom line, and the portability of the Mavic line into one system. DJI also added many new welcome features including 10-bit color support in their video codec (for more accurate colors and better looking grades in post), an automated hyperlapse feature, and a new 1 inch Hasselblad sensor for better imagery. This is the drone we recommend to everyone for travel.
Our Tripod Photographer: Benro Slim Travel Tripod In Carbon Fiber
Shot with 24mm f/1.4 Lens on Benro Travel Tripod

Shot with 24mm f/1.4 Lens on Benro Travel Tripod

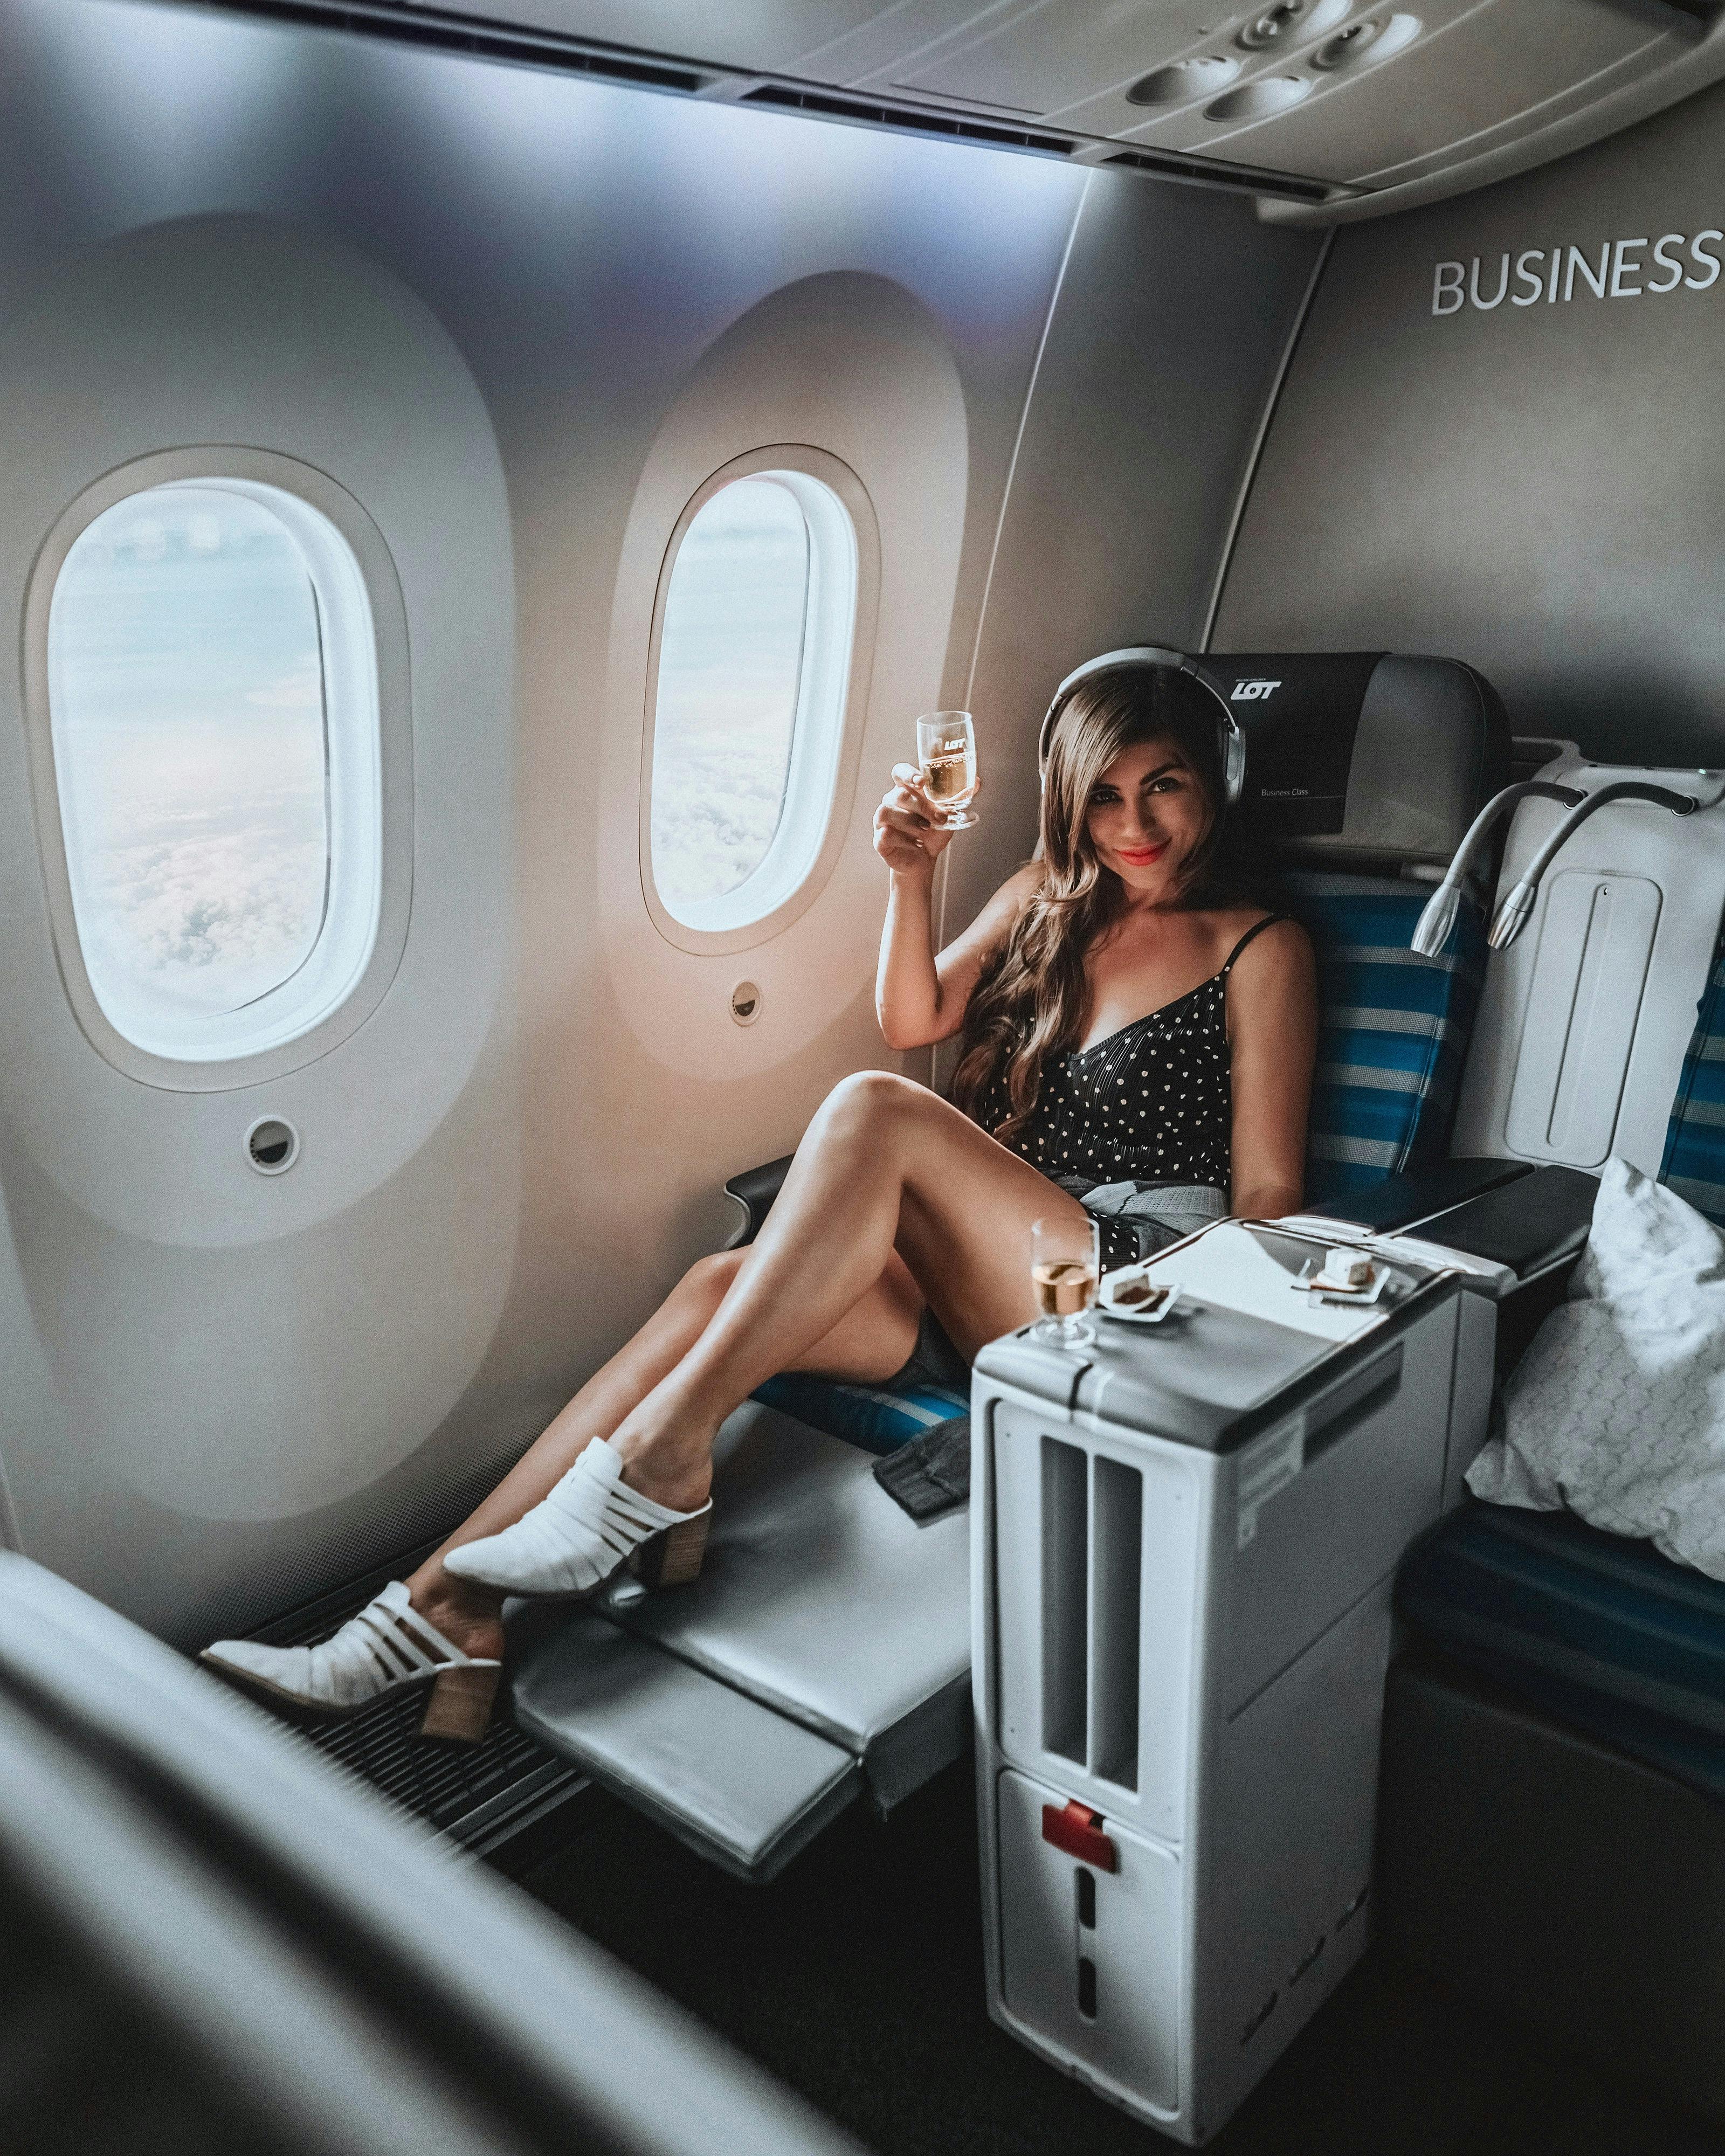
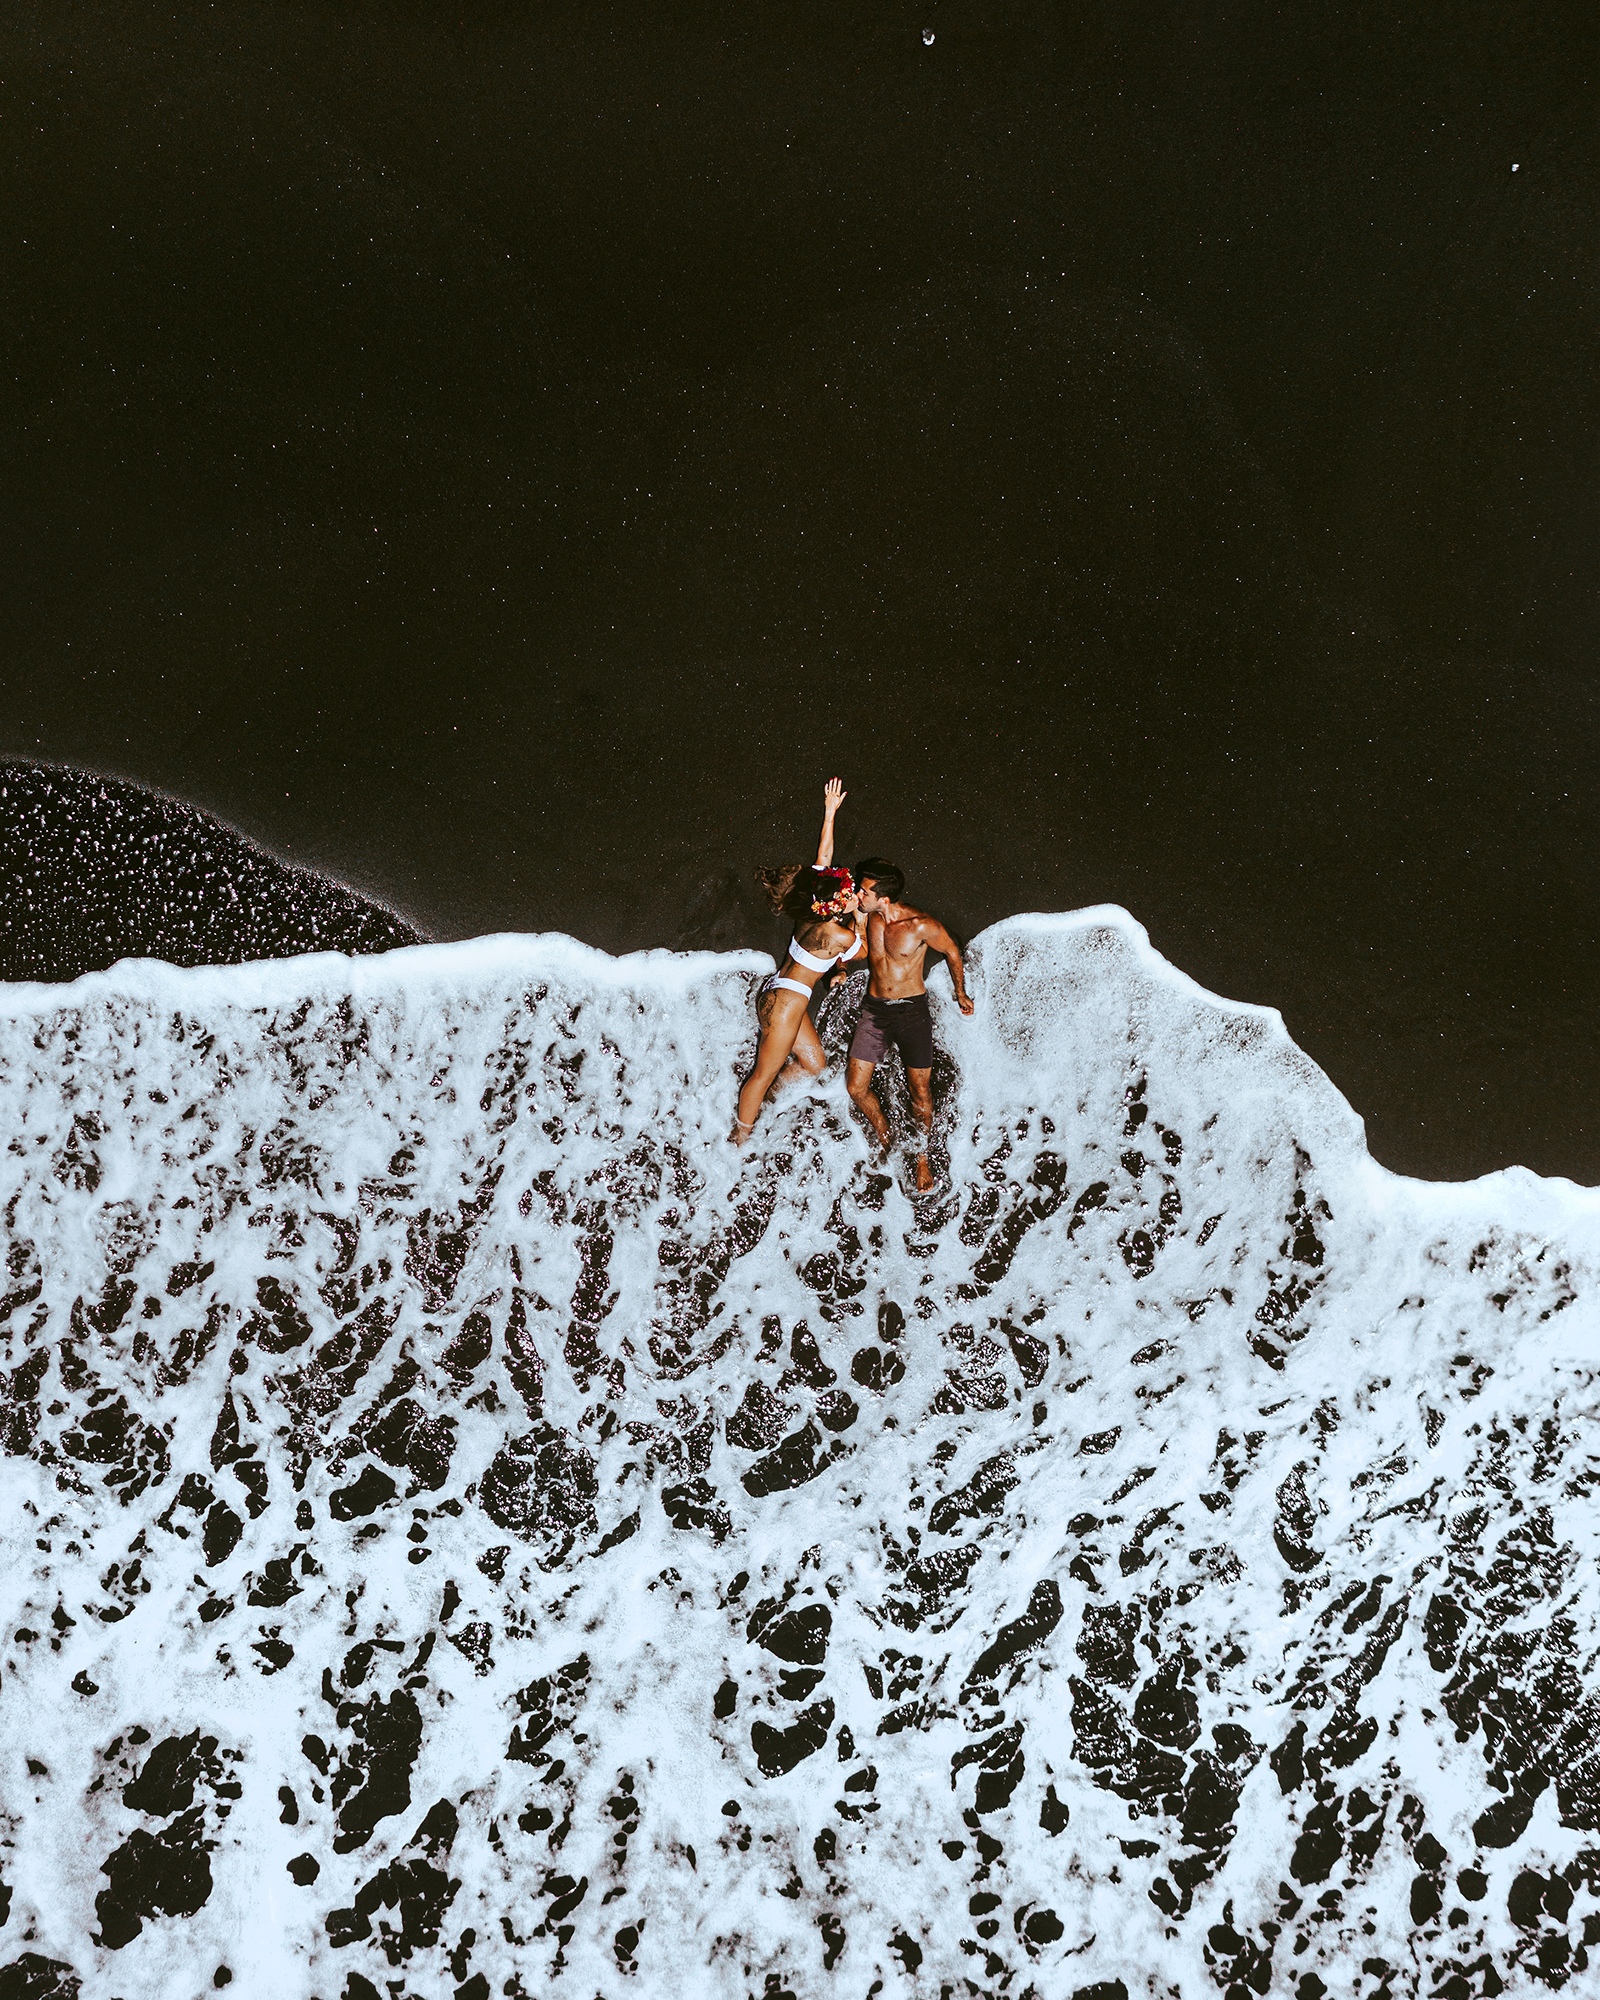
I get asked so often about who takes the majority of the photos of Brandon and I together. And the answer is so simple - we take them ourselves with just a tripod and an intervalometer shutter (see below for this one!). After a lot of research, we chose this tripod because it is strong, reliable, compresses into a small space for packing and with made Carbon Fiber, only weighs 2 pounds. I've been using Benro Tripods since photography school, and this Travel Tripod is one of the main items that we always pack and it has never once let us down. Yes it is possible to get a smaller tripod for cheaper, but especially if you're going to be stepping away from your camera for the shot - you want to make sure it's secure!
The BIG Secret to our Couples Shots: Intervalometer for Sony
24mm Lens Shot on Benro Tripod with Intervalometer
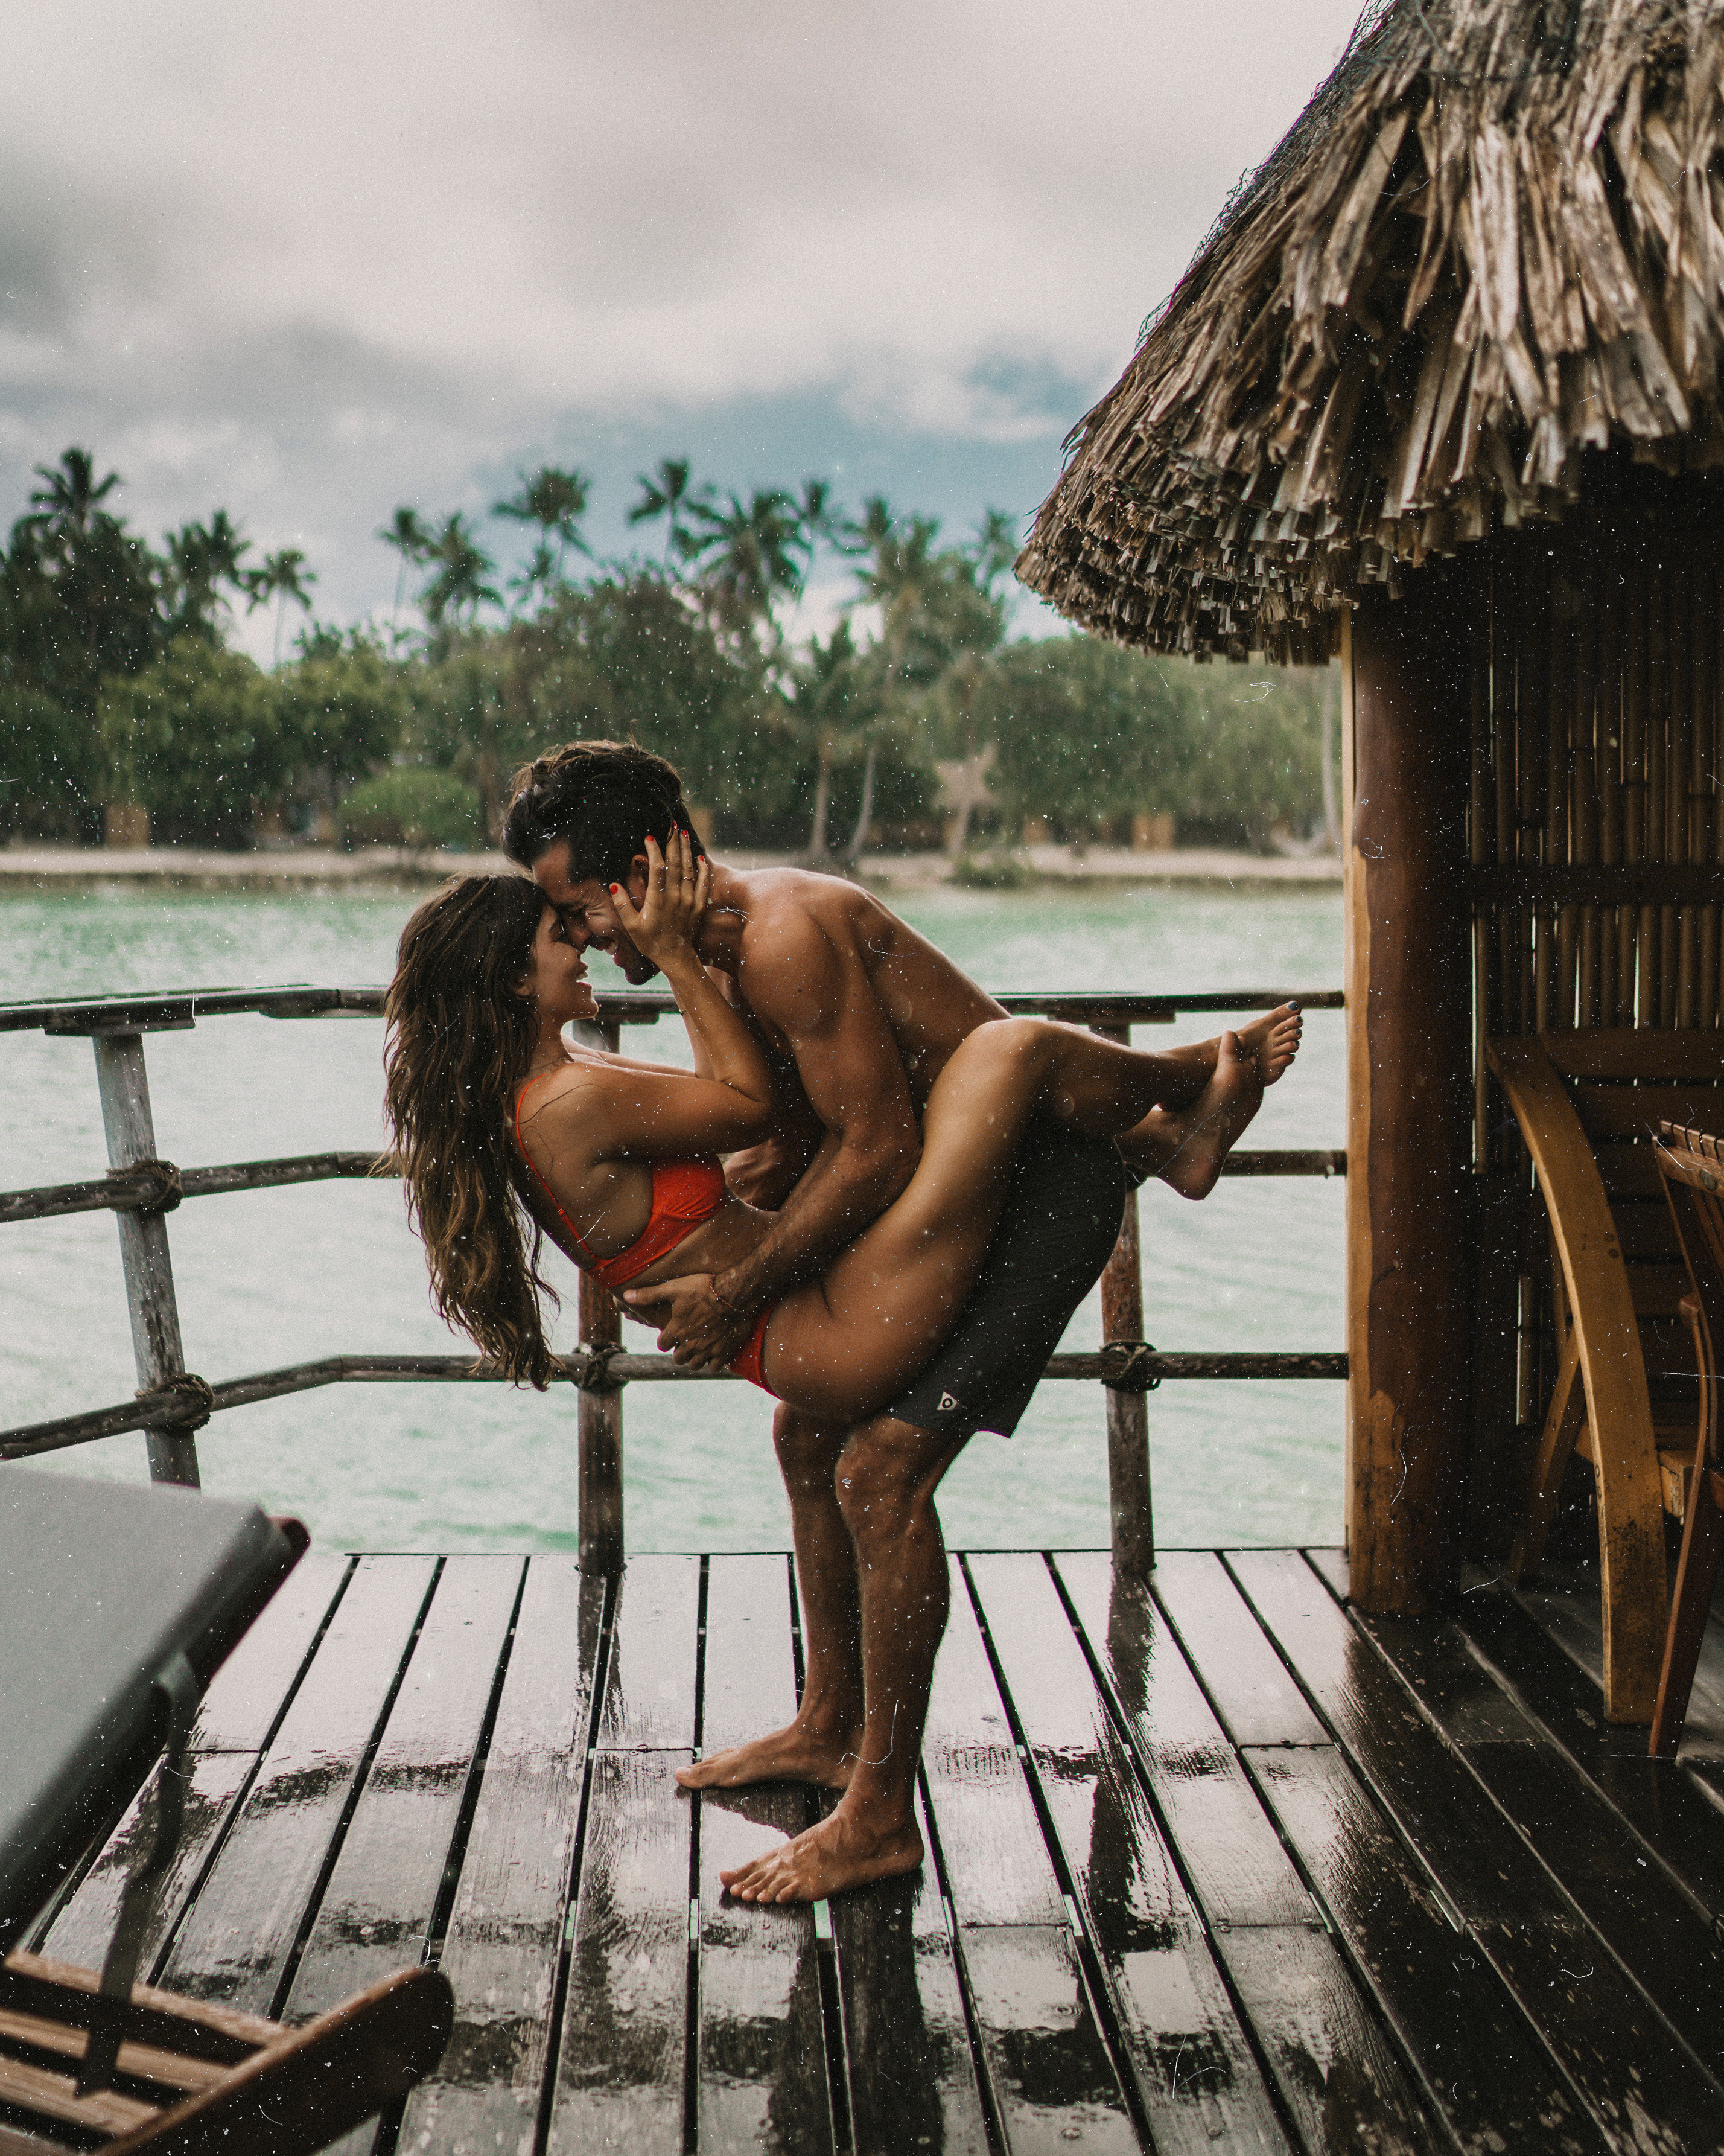
35mm Lens Shot on Benro Tripod with Intervalometer
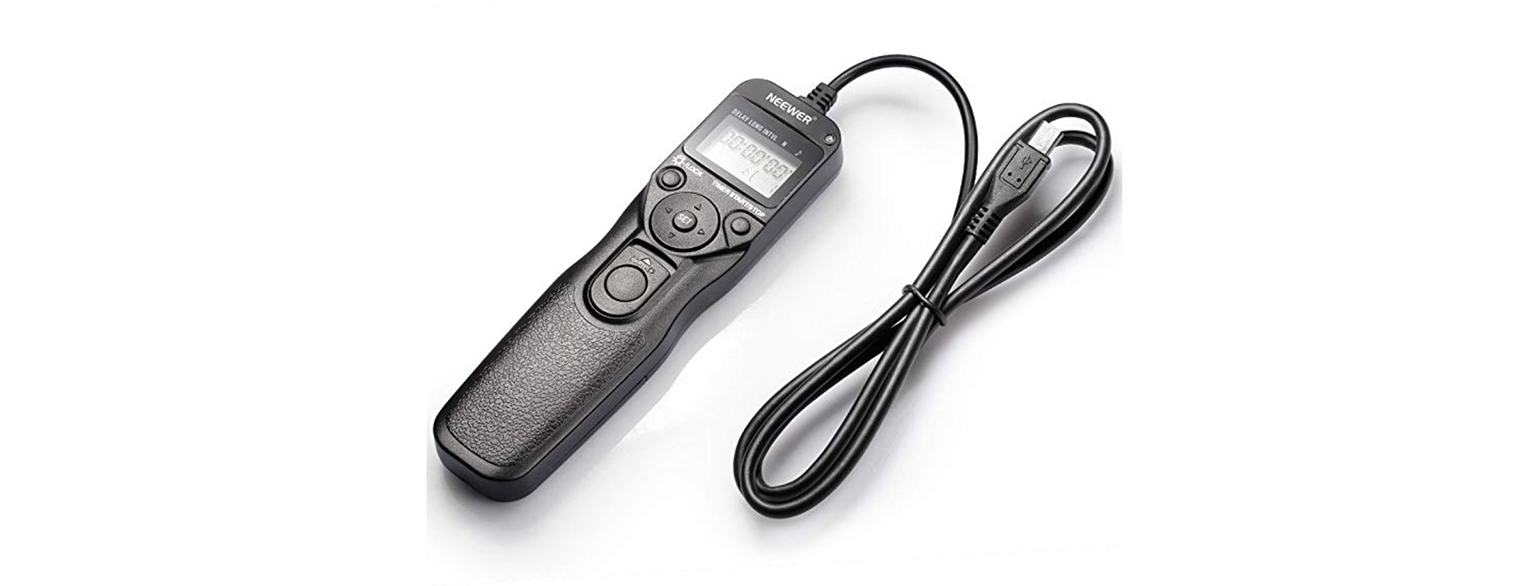
This $20 Device made the HUGEST difference in our ability to shoot together without having anyone else with it. It's so simple, and once we discovered it, we couldn't believe how long we lived without it! An Intervalometer is a simple little device that you plug into your camera to take photos on an interval. Depending on what mode our camera is on, it will shoot either 1 frame every set number of seconds (anywhere from 1 second to infinity), or a burst of 8-15 frames with each interval. After a few years of fiddling with self-timers, remotes, and connecting our cameras to buggy phone apps, this intervalometer changed everything for us, and gives you the ability to step really far back from the camera, move around, even jump into water together! I don't know how ever lived without it, and it's only thing I make sure to always, always pack.
Whenever I am on press trips without Brandon or shooting on my own for whatever reason, this is an even bigger help! The ability to move and shoot on your old quickly and efficiently without having to deal with remotes and limited timers is also a huge game changer for a solo traveler.
How We Color and Edit: Away Lands Presets
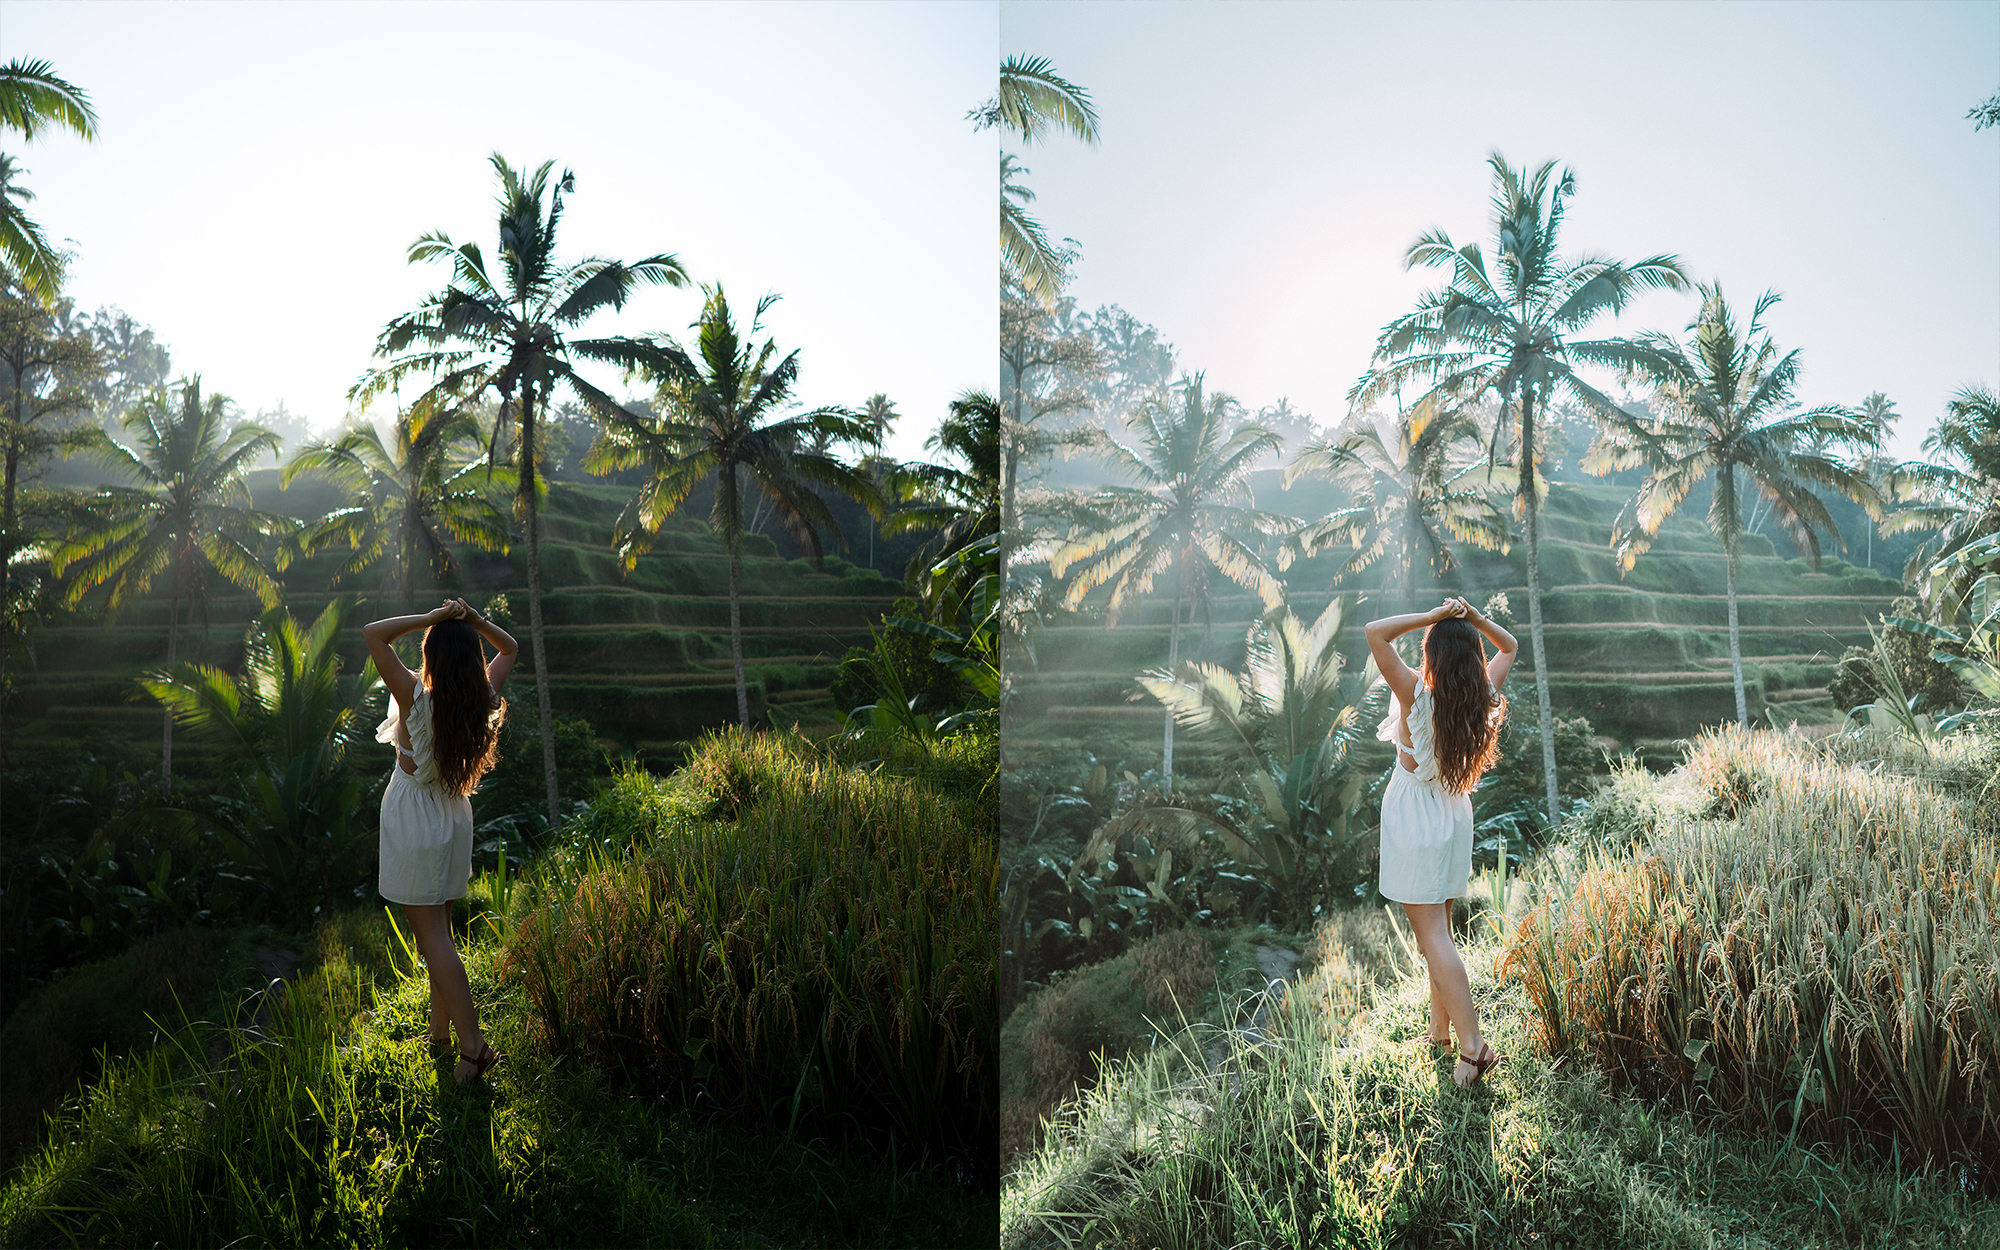
Capturing images is only half the fun! Once you've got the gear, boarded and unboarded the planes, and taken all of the images - it's time to color and edit them! Over the past couple of years, I have distilled our thousands of edits into a few preset packs that have been specialty made to be as universal as possible - so the same edit will work on a huge variety of images, with just a few simple tweaks. Check out our preset shop over at AwayLandsShop.com and use the code 'IReadYourBlog' for 10% off any order.
My Best Editing Tool: Wacom Tablet
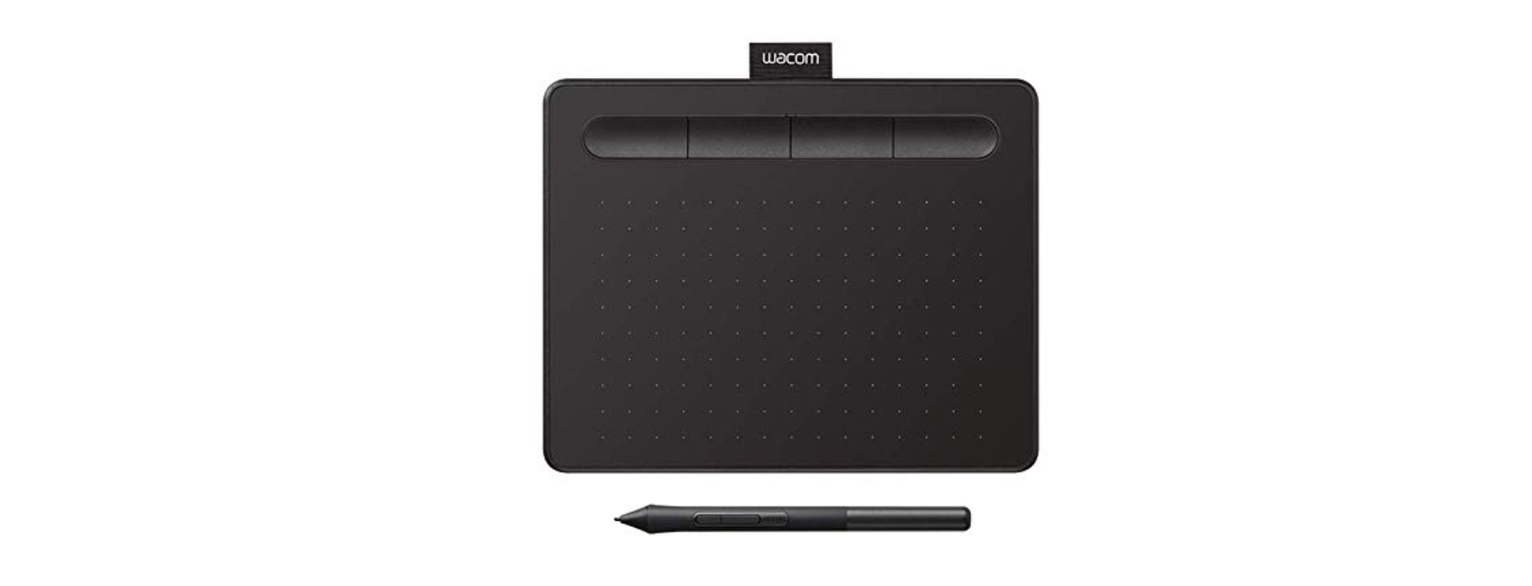
I learned how to edit with a Wacom Tablet many years ago and am constantly surprised at how few travel photographers seem to use them! A Wacom is essentially a digital drawing device, and is used extensively by professional photographers and editors. I use the small version (I always have, I prefer it, but now it is great for portability), and slip it into my laptop sleeve when I'm traveling. The device plus into a desktop port or the side of laptop and makes editing images so much easier - especially if you are using brushing, painting, healing, comping in areas from different images, or any more advanced edits than just color. My first couple years of digital imaging I was pretty scared to used them (I cannot draw at all!), but it took literally 2 days of use before I got used to it and started using my tablet constantly. If you are getting deeper into digital imaging, I would highly recommend checking out a Wacom - I can guarantee you'll be hooked!
What If I'm a Beginner or Can't Spend that Much?
There was a Meme that used to always get passed around my photography school: "Get your kids into photography and they'll be too broke for Drugs!" And it is true - photography gear is expensive, especially good quality products. If you're looking to save money, here are the 4 places where I would recommend doing that:
- Start with a lower-end camera line - If you don't need the full power of the highest end professional line, check out the more consumer or pro-sumer lines to build a kid at a much lower cost. You can now get a full a6000 kit for $700 or the above-mentioned A7II kit for $1000 - and both can take you a long way!
- Look for camera models from a year or two ago - The Sony A7RII that we still have and shoot is now priced at almost 50% less than the newer model, and is still an incredibly powerful and professional model - the technology is still fantastic. If you are looking to move into a more professional line-up at a lower cost, a great place to start is to look at slightly older models.
- Sigma lenses - Standard thinking in photography has always been to invest in lenses - and they can last you for decades - and I have always been sometime to buy high-quality, native lenses for my cameras. However, the Sigma Art line up has been so impressive the last few years, I feel very good recommending them highly. Beyond the above mentioned 24mm lens, they have great versions of my recommended 85mm f/1.4 and 35mm f/1.4 lens picks.
- Buy Less Options - This isn't rocket science here, but choosing one or two lenses that you need the most could be a good way to build out your starter kit for a lot less. If you don't tend to shoot shallow very often, a zoom lens can be a great all-purpose pick eliminating the need for multiples.
And the 3 Things I would Never Skimp On:
- Media Storage - I will never, ever buy a lower cost external drive again. I have lost files too many times, that it's not worth it. We have whole trips that we have none of the images from due to drive failures.
- Anything that protects your camera from water - I have definitely been tempted by lower-cost underwater housings, or those weird plastic condom things that seemingly have really great reviews, but you need to protect your investment. It doesn't take much water to completely ruin a camera (I once lost a Canon 5D in a freak wave incident in Malibu - it was only in the water for 3 seconds and it never turned on again.)
- Off-Brand picks for most things - for the important stuff (Cameras, lenses, and protection), I always buy from trusted brands. I would rather have an older model of something than one that isn't trustworthy.
Happy Shooting!
Pin it for Later!